Release notes 7.4

Contents
Below you'll find a brief overview of new functionality implemented in Axiell Designer 7.4, including links to more information. For some notes on compatibility issues see the Axiell Designer compatibility topic.
Any new Designer settings typically pertain to adlwin.exe-based Adlib applications, unless indicated otherwise. If a setting also pertains to applications run within an Axiell Collections environment, it will be noted explicitly. Any old or new settings which do not pertain to Axiell Collections, should have no negative effect on the operation of this software.
Contents
Access rights for data dictionary fields, based on record type
Record type access rights for enumeration values
Copying all label translations at once
Adding comments to screen and field conditions
New Fields column in Index list view
Adding comments to field definitions
A Simple search method for Axiell Collections
Standard field validation separated from field validation by adapl
Overridden fields in field lists displayed in ochre
Documentation functionality in Designer expanded
Looking for output formats with the Object searcher
Forcing a line break on brief display screens in Adlib
Format string also applicable to related and equivalent terms
More functionality in the Application tester
folderId=%priref% in wwwopac.ashx image server calls
Access rights for data dictionary fields, based on record type
The record type functionality introduced with Designer and Adlib 7.3 is the basis for new functionality in Designer 7.4 allowing you to set access rights per record type for a data dictionary field or for a selection of fields at once. This functionality has effect in both Adlib 7.4 and Axiell Collections 1.0. It is in fact a new, more robust way of limiting the use of fields than the older screen level conditional fields functionality provides, as they both allow you to hide a field based on the value in some other field. One important difference though, is that the new functionality relies on the need for and existence of a record type field which actually allows the user to register different record types in one and the same dataset. Another difference is that conditional fields are a very superficial way of hiding fields: if a database field appears on multiple screens, the field condition must be set on as many screens. The new record type based way of limiting the use of certain fields however, is as pervasive as other access rights on database level: once you set field access rights based on record type, the access rights will automatically apply to all entry fields on screens associated with the relevant data dictionary field, and even to any access points associated with the (indexed) data dictionary field.
Proceed as follows to set access rights:
| 1. | First make sure you have actually specified a record type field in the current database: this can be done on the Advanced properties tab of a selected database definition in the Application browser. In the Record type field property, simply look up the desired, existing enumerative field in the current database, which has been indexed with the (index) Key type option set to Text. |
| 2. | From Adlib 7.4.16250, if a record type field has been specified for a database, then for all fields Full access rights have to be specified for the record types for which these fields must be visible on screens. Now you don't have to edit each field in the data dictionary to make it visible on screens again after setting a record type field: a database for which a record type field has been specified, presents an extra properties tab called Default record types. All you do here is specify the default access rights per desired record type or $REST, which should apply to all fields for which that record type has not been assigned any access rights. $REST stands for all record types which have not been assigned access rights for a field. For example, after specifying a record type field for database Collect, all fields on all screens in the object and archive data sources would be hidden by default. To fix this, simply specify Full access rights for "Record type" $REST on the Default record types properties tab of Collect. Since no specific record type access rights have yet been specified per field, this will just show all fields again, for any record type. Will it ever be necessary to set default record type access rights other than $REST = Full? Well, maybe only if you have a record type x for which only a small number of fields (less than half the total number of fields in the data dictionary of the relevant database anyway) must be visible on the screens. Although you can also set field-level record type access rights in batch, it's just the least amount of work to specify default record type access right None for that specific record type here too, so that you'll only have to specify Full access rights for this record type per field for a relatively small number of fields. From a design viewpoint it's probably also best to specify defaults here only if they apply to the majority of fields: it's logical to only specify the exceptions to the norm on field level. Note that record type access rights on field level always override the default access rights for the same record type on database level. 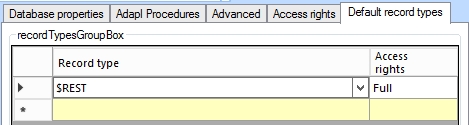 |
| 3. | Only when a record type field has been specified for the current database, an extra properties tab will also be visible for each field in the data dictionary of this database: the Record types tab.  Click an empty box in the Record type column to open a drop-down list showing you all possible values from the designated enumerative record type field: select a record type and set the desired access rights in the column next to it. If you'd like the current field to be hidden on all screens for certain record types, then select each of those record types here and assign access rights None. On the other hand, record types which must have access to the field must be given the access rights Full. Or choose Read to make a field read-only for the record type. Any record types which are not assigned any explicit access rights here on the Record types tab, will have None access rights implicitly if you haven't specified default Full access rights for "record type" $REST on database level! Instead of specifying record type access rights per field, you can do this in batch for a selection of fields as well: in the Application browser Field list display (which will be shown after you click the Fields list header in the tree view on the left), simply select all the fields to which you'd like to assign identical access rights (use Ctrl+clicking or Shift+clicking), right-click your selection and choose Set record types at the bottom of the pop-up menu which has opened. 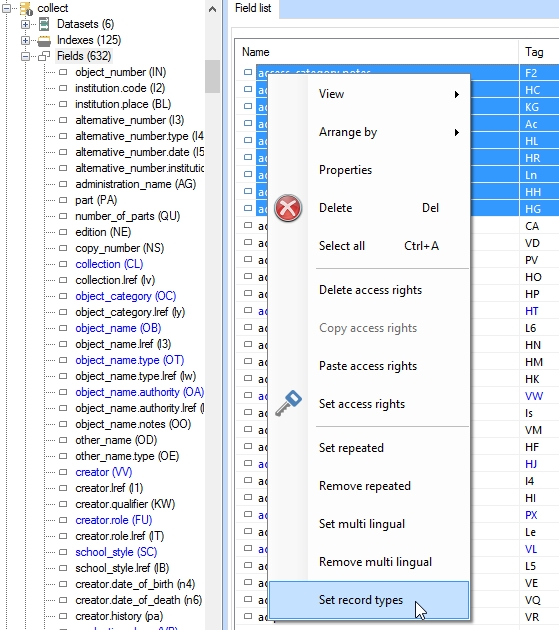 The Set record types window will open, allowing you to set access rights per record type in the same way as you would on the Record types properties tab, but for all selected fields at once. If any of the selected fields already contain record type access rights, then those will be overwritten as far as you specify them here in the Set record types window: other record type access rights will remain as they were while previously unspecified record types will be added, together with their new access rights, if you specify them now.  |
Record type effects in the Search wizard
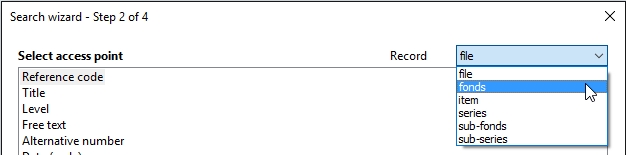
Once you've set record type access rights for fields in a database, the effects won't just be noticeable on screens (where certain fields will be hidden for certain record types), but from adlwin.exe 7.4.16152.2 the Search wizard will be affected too. If in Step 1 of the Search wizard you've selected a data source which database has a record type field, then in Step 2 and Step 3 an extra drop-down list will be present, containing all record types available to the user*. Now the list of access points in Step 2 will depend on which record type the user selects in the list. An access point will be hidden for a certain record type if the associated (indexed) field has record type access rights None for the relevant record type. The access points list will be adjusted every time you select a different record type in the drop-down list. This way the user only gets to see the access points which are relevant to the selected record type. The currently selected record type will also be remembered by Adlib, for next time the user opens this data source.
Another effect of setting a record type in Step 2 or Step 3 is that the searched records will actually be filtered on that record type, so you'll only find records of that particular record type.
* Every value in the list of any enumerative field can be assigned role access rights (the "old" type of access rights, so to say), to prevent users with a certain role to pick certain options from the list when editing a record. These access rights also affect the contents of the Record type drop-down list here in the Search wizard if for certain enumerative values None access rights have been set for the role of a user. In such case, restricted users may not get to see all values in the Record type drop-down list, simply because they don't have the access rights.
Further remarks:
| • | Axiell Collections also works with record type access rights, as well as Adlib for Windows. |
| • | If you set record type access rights for a linked field, preferably also set the same access rights for its link reference field. |
| • | Removing record type access rights must still be done manually, per record type/access rights setting per data dictionary field. |
| • | Once you've set record type access rights for a field you won't be able to open the \data folder with older versions of Designer any more, nor will you be able to run the application with Adlib for Windows (adlwin.exe) versions older than 7.4.16152.2. Removing all record type access rights will restore backwards compatibility with version 7.3. |
| • | In effect, the record type access rights are an extra access rights mechanism next to the existing role-based access rights mechanism. Before a field is displayed on a screen, Adlib will check all applicable access rights and applies the most restrictive of those rights. |
| • | In Adlib, the brief display tab header will show the (neutral value of the) record type used in the search as a prefix to the search query. |
| • | If you'd like the enumerative list of the designated record type field to show different values for the different datasets in a database, you can use the Field properties per dataset functionality to redefine the record type field and its enumerative list per deviating dataset and override the default field specification on database level. This allows you, for example, to offer different record types for the archive and object datasets (which are part of the same database). |
Record type access rights for enumeration values
With the record type functionality allowing you to hide or show fields based on what type a particular record is, you may also like to able to rule the contents of drop-down lists, based on record type. For record type "A" you may want to offer the user a different subset of all the enumerative values specified for such a field then for record type "B".
From Designer 7.4 you can make this happen by specifying record type access rights per enumeration value. You can do this on the Record type access tab of the Enumeration properties editor which opens automatically once you click a Language value in the Enumeration values list on the Enumeration values properties tab of an enumerative field in the data dictionary. (You must have already set up a record type field for the current database, to make this work: for more information see the Record type field topic in the 7.3 release notes.)
On the Record type access tab, you may then add record types and their designated access rights, as you please. Preferably choose between None (to hide an enumerative value) and Full (to show an enumerative value). You can make different settings per enumeration value.

Per enumeration value you may set both Access rights based on user roles as well as Record type access rights. Using only one of both or both at the same time, has the following consequences:
| • | If for a particular enumeration value no access rights have been specified for a specific record type or $REST, then for this record type the normal role access rights mechanism will be applied, which will only show the value in the list if the role of the current user has access rights to the value. |
| • | If record type access rights other than None have been specified for a particular enumeration value for the record type currently opened by the user, then show the value in the list if the user has enough access rights based on his role. If instead the record type access rights have been set to None or if the user role access rights are None, then the value will be hidden. |
This functionality has effect in both Adlib 7.4 and Axiell Collections 1.0.
Copying all label translations at once
During application maintenance you often come across situations where you've added a new Adlib object somewhere, a method for example, which should get the same label translations as some other object, a screen field maybe. Previously that would have meant having to copy each translation of the desired label separately: quite a tedious task if you needed to copy many translations.
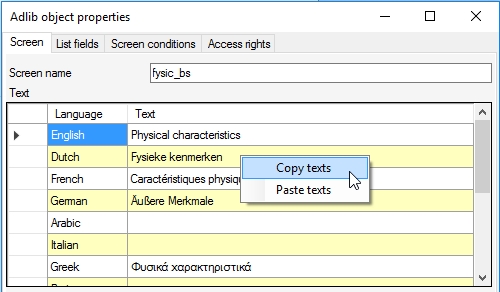
From 7.4 you can copy all translations of an object label or name to any other object suited for translated labels or names. Simply right-click somewhere inside the relevant Text box in the properties of an Adlib object (such as a screen, a screen field, a method, a data dictionary field, a data source, etc.), and select Copy texts in the pop-up menu. Then open the label or name properties of your target object, right-click inside the desired Text box and select Paste texts in the pop-up menu. If you paste the copied texts into a Text box which already contains texts, then the Text box will first be emptied before the copied values are pasted.
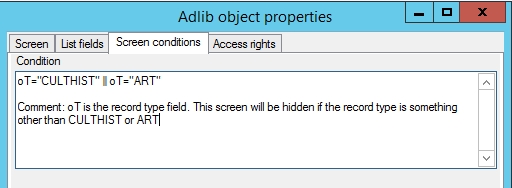
Adding comments to screen and field conditions
From 7.4, only the first line in the Screen conditions and Field conditions properties boxes are considered the conditional expression. After the first new line (press Enter behind the condition), all text is ignored by Adlib, so you could add comments here to explain the conditional expression.
Designer 7.4 allows you to add a single* custom data language to the Windows system on which you run Designer. All software on this system, including all Adlib and Axiell applications running on it, will then be able to handle this new language. In multilingual Adlib applications and Axiell Collections you may need a custom data language if you need to register some data in that language while the relevant language doesn't have a standard language code.
Proceed as follows:
| 1. | You will have to run Axiell Designer as an administrator to be able to use this functionality: in Windows Explorer, right-click ADLIBDesigner.exe and in the pop-up menu which opens, click Run as administrator. Windows will ask you for confirmation. |
| 2. | Now open a random Adlib application in the Application browser - select the application structure file, the .pbk itself - and open the Advanced properties tab for it. |
| 3. | Right-click any data language in the Data languages list (it doesn't matter which one you choose) and in the pop-up menu click Add language. (The option will be greyed out if you do not run Designer in administrator mode.)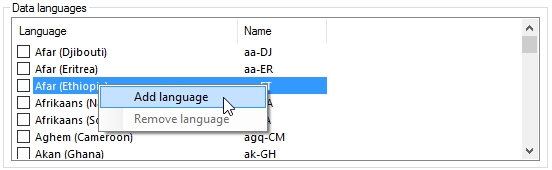 |
| 4. | The Add data language dialog opens.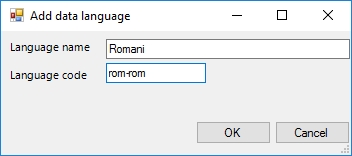 In the Language name property, enter a name for your custom language. This name will be visible in your Adlib and Axiell applications. You don't need to use an official language name per se. For Language code enter some made up code that doesn't exist in the Data languages list yet. Let it be a code starting with two or three letters, followed by a hyphen and again two or three letters: the first part of the code can be different from the second part. Choose a sensible language code. |
| 5. | Click OK to add your custom language definition to the Windows registry immediately. The Data languages list on the Advanced properties tab will be updated automatically and you'll find your new language in the alphabetically sorted list where you would expect it. Mark it to include the language in this particular Adlib and/or Axiell application.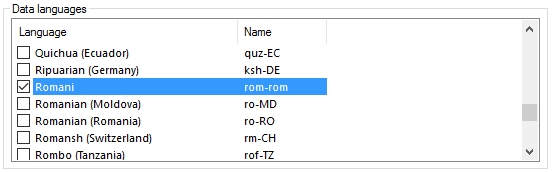 |
| 6. | In Adlib (and Axiell Collections too) you'll now find the added language in the Data language drop-down list.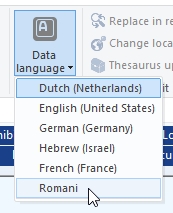 |
* The custom language will be registered in the Windows registry and Microsoft has limited this customization to the possibility of adding only a single custom language. If you need to register data in more than one language that doesn't appear in the standard codes list, you may consider creating a single dummy language name and code which represent all those non-standardized language codes: then at least you won't have to use an incorrect data language.
Removing your custom data language
If you haven't saved any record data in your custom data language yet, you can remove it safely too.
| 1. | First deselect the custom language in all Adlib/Axiell applications in which you set it up earlier and save the change in those applications. |
| 2. | Start Designer in administrator mode again. |
| 3. | Select any application in the Application browser and open the Advanced properties tab. |
| 4. | Look up your custom language in the Data languages list, right-click it and choose Remove language in the pop-up menu. The custom language will be removed from the Windows registry and the Data languages list immediately.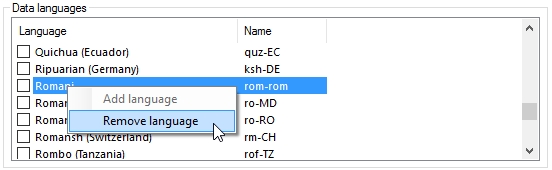 |
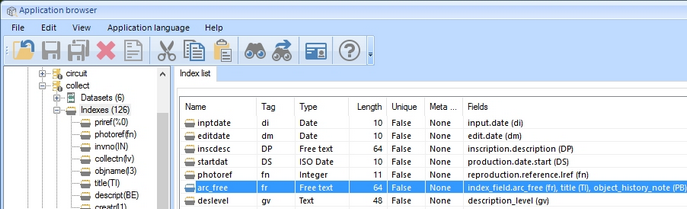
New Fields column in Index list view
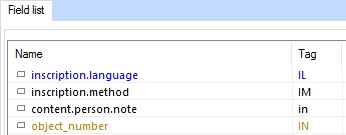
In the Index list view, which appears in the right window pane of the Application browser when you select the Indexes list header underneath a database definition in the tree view in the left window pane, a new Fields column has been added to show all fields (field names and tags) indexed in that particular index. Although most indexes index just a single field, some index multiple fields, so the new column helps tracking down such indexes.
Note: if the Fields column initially appears to narrow to show all its contents, simply drag the right border of the Fields column header to the right to widen that column.
The Field list grid view (which becomes visible once you click the Fields list header in the tree view of a database definition in the Application browser), the Index list grid view, the Method list, the Dataset list, the Internal link list, the Feedback database list, the Output job list, the Friendly database list, the Export job list, the User list and the Screen list have been revamped, offering a lot of new features. Since the new features are the same for all grid views, we'll illustrate them by the Field list grid view only.

| • | You now have full control over which columns (properties of fields really) are being displayed in the grid. To hide a column, right-click the column header with the property name and in the pop-up menu, click the Hide column option. To add new columns to the grid, right-click any column header and in the pop-up menu, click the Column chooser option. The Column chooser lists the properties available for grid display: double-click the desired property to include the column in the grid view. The newly added column will be positioned on the far left initially.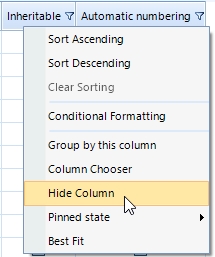 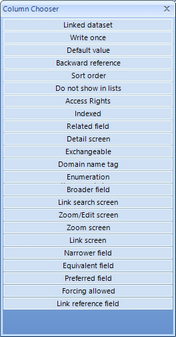 |
| • | You can drag any column by its header to the left or right to another position, if you like. You can also resize the width of a column by dragging its right header edge, or right-click the column header and select Best fit to make the column as wide as the longest value in that column.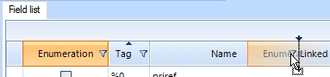 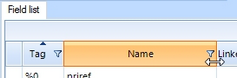 |
| • | Columns can be pinned to the left or right of the Field list window pane by right-clicking the desired column header and selecting Pinned state > Pin at left/Pin at right in the pop-up menu. This means that such pinned columns will be fixed to either side of that window pane and won't move if you scroll the grid view left or right (only if the Field list window pane is not wide enough to display all columns at once). A pinned column, a Name or Tag column on the left for example, makes it easier to see which properties in columns on the far right belong to the field(s) you are interested in: just scroll the grid view horizontally to bring them closer to the pinned column(s). You can unpin a pinned column by right-clicking the desired column header and selecting Pinned state > Unpin column in the pop-up menu. 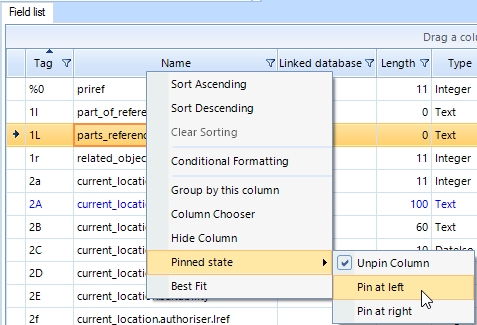 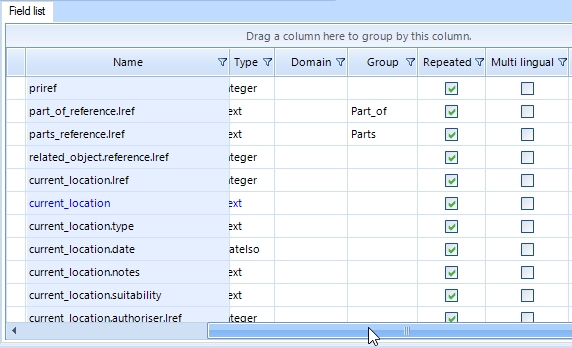 |
| • | You can sort the grid view on any column alphabetically - ascending, descending or sorted in the chronological order the field definitions were originally created - by clicking the (middle of the) desired column header once, twice or three times. A little black arrow above the header label pointing upwards indicates an ascending sort. When it points down it indicates a descending sort, while chronological sorting is applied if none of the column headers display the little black arrow.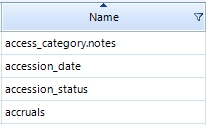 |
| • | You can group fields by one or more properties, by dragging column headers to the Drag a column here to group by this column bar just above the column headers (or by right-clicking the desired column header and choosing Group by this column in the pop-up menu). Suppose you'd like to group all linked fields per domain per linked database, then first drag the Linked database column header to the bar above it, followed by the Domain column header. Per linked database you now have a group of domains (if present) containing an applicable group of linked fields: each group can be expanded or collapsed by clicking the little arrow in front of its label. The screenshot below shows two fields l7 and VV which apparently are the only fields in Collect linking to the MAKER domain in the People database. Note that you can change the group sorting as well, by clicking the labels of the Group by properties. Clicking the little crosses in those labels will remove those properties from the grouping.  |
| • | You can apply filtering to the list of displayed fields so that it only shows fields which meet your filtering condition(s). Each column has its own filter allowing you to filter the displayed list on any of the currently available values in that column. So typically you would filter on values (or partial values) that appear repeatedly in the column, like the name of a linked database, the name of a field group, a specific field data type. Per column you can set a single filter, but you can set filters for multiple columns. Click the little funnel icon on the right side of a column header to open the filter settings for that column. The following functionality is available here: - You can resize the filter list by dragging its lower right corner, but you cannot move this window. - By default, all available values are marked, so that no filtering takes place by default. - Deselect all checkboxes at once by clicking the marked All checkbox. 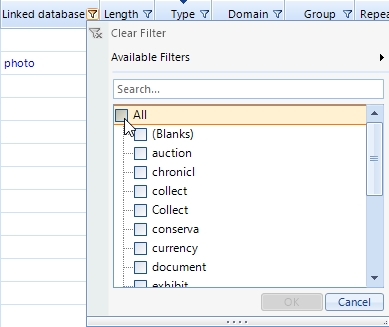 - Click the desired checkbox(es) in front of individual values to filter on them. 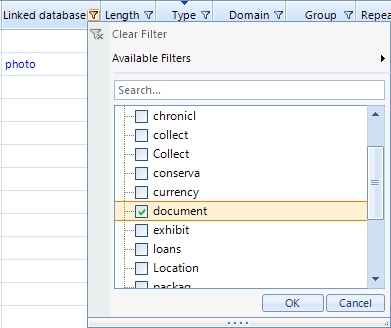 - If the list of values is long and you already have an idea of what you're looking for, you can start typing that value in the Search... box. The list of values will be updated according to your search, for you to find and mark the desired value(s) more easily. 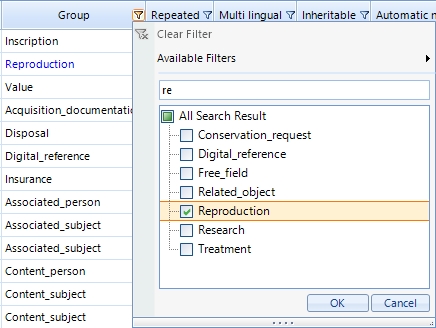 - Once a filter has been set for a column, the funnel icon becomes orange. - To remove a filter, click an orange funnel icon and select the Clear filter option in the filter list. 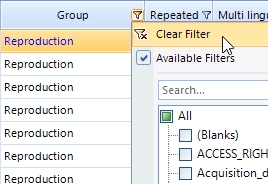 - The Available filters option in the filter list allows you to set a filter by means of a single or Boolean combined string comparison. This filter type replaces any filtering set up via the checkboxes in the list of values. For example, if you'd only like to see field tags which contain a percent character, you'd first select the Contains filter in the sub-menu of Available filters. 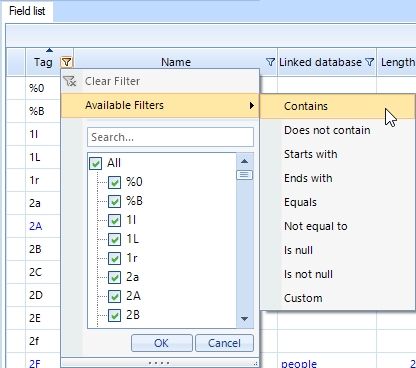 In the Filter dialog you then specify your filter. The Contains operator has already been selected. Behind it, enter the character(s) to filter on, % in this example, and click OK. You can even provide a second condition here and combine it with the first using the Boolean And or Or. By marking the Not checkbox you would negate the truth value resulting from the filter condition(s): so if you were interested in all fields not containing a percent character you would extend the current condition by marking the Not checkbox (which of course would have the same result as using the operator Does not contain and leaving the Not checkbox deselected). 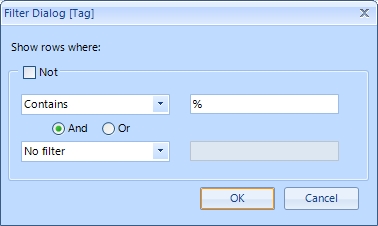 |
| • | The Conditional formatting option in the right-click pop-up menu finally, offers some really advanced options to format the layout of rows based on certain conditions or expressions. Although the option is active, it's sort of meant for possible future use and we currently do not recommend using it as the settings you make won't be remembered for next time. |
| • | The settings that will be stored between sessions are: - column order - column visibility - column width - column pinned state - sort column and sort order |
Finally, note the following:
| • | Three properties of some objects, like fields, methods, screens and indexes, cause those objects to be coloured in either ochre (fields of which the properties are overridden in at least one dataset), blue (linked fields) or red (objects with access rights).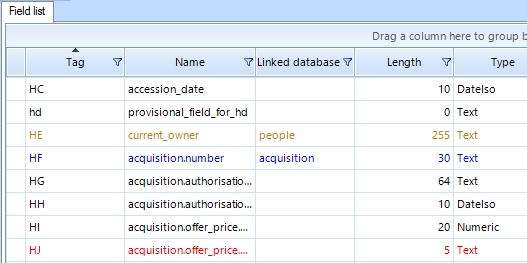 |
| • | double-clicking a field row will always take you to the actual field definition. |
| • | You cannot edit checkbox properties in the grid view by clicking them. |
| • | You do have some bulk edit operations at your disposal in the right-click pop-up menu for selected field rows, but these are powerful options if used for large selections of fields so be careful when using them: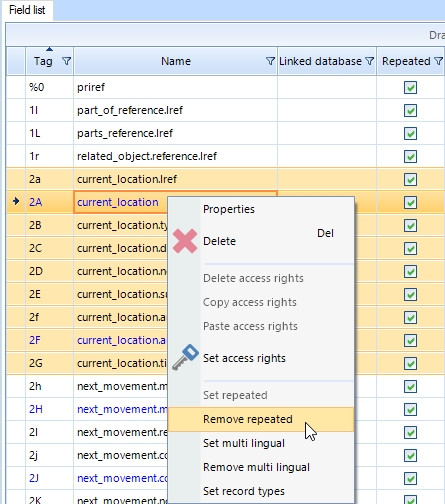 |
Adding comments to field definitions
The properties of field definitions now include an extra tab called Developer notes. It allows application managers to add comments to individual field definitions. Since the field name itself may not always explain its use or the reason why it was added, such comments help to document your changes.
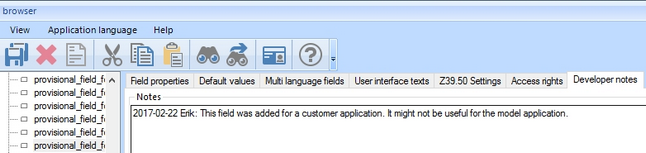
Any added developer notes will also be included in the database structure documentation which Designer can automatically generate for you.
Warning: adding developer notes does break compatibility with older versions of Designer and Adlib for Windows (adlwin.exe) versions older than 7.4.17047.1.
A Simple search method for Axiell Collections
Above the context toolbar icons above the result set view in Axiell Collections, you have the option to quickly execute a new search by selecting a field from the drop-down list of all indexed fields in this database, after which you simply enter you partial of whole search key (no truncation needed) in the Enter search key box and click the magnifying glass.
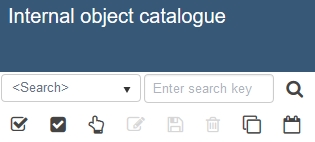
Besides the full list of indexed fields, you can now add a simple-search option which can search multiple indexed fields at once. In the screenshot above it's called <Search> but you can name it differently if you want.
You must set it up per desired data source in your (.pbk) application definition in the Designer Application browser, as follows:
| 1. | In the tree view on the left, open the data source to which you'd like to add this simple-search option. |
| 2. | Right-click the Methods list header and select New > Method in the pop-up menu. |
| 3. | On the Method properties tab, for Method type, select Simple search. |
| 4. | In the Menu texts box enter the name for this new access point which will be visible in the user interface between < and > at the top of the list of indexed fields. Name it Search, for example. Add as many translations as are required by the users of your application.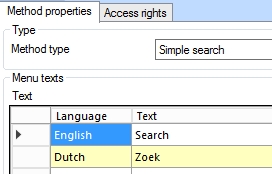 |
| 5. | At the bottom of this properties tab, in the Simple search fields box enter one or more field tags (one tag per line) for which an index exists. (These indexes may in turn index just a single field or multiple fields.) The field tags do not need to be of the same data type. There's no comfortable way here to look up the tags you need, so you'll have to do that in the database definition. 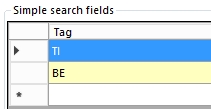 |
| 6. | Save your changes in the application definition. |
| 7. | You may have to recycle your Axiell Collections IIS application pool before the changes become visible in Axiell Collections. |
Standard field validation separated from field validation by adapl
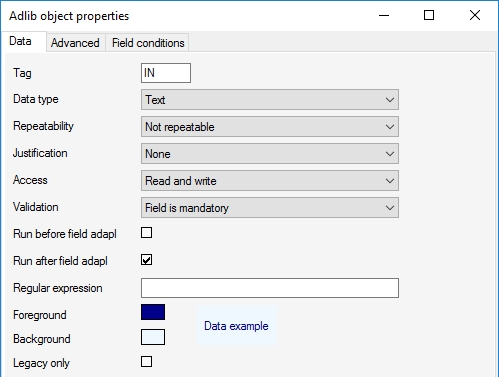
In the Validation property of a screen field you've always been able to set whether the field was mandatory, mandatory in group, had to be "complete" or whether an adapl had to be run before or after entering this field. Two new checkboxes, Run before field adapl and Run after field adapl, now expand your field validation options by allowing you to set up a field to be both mandatory (or must be complete) AND be validated by an adapl. The advantage of being able to combine these two types of field validation is if you really need to use an adapl to validate data entry while the field must be mandatory too, then from now on you no longer need to write before-storage adapl code to check whether the field has been filled in at all (and cancel saving the record): the normal Field is mandatory setting (or Field must be complete or Field is mandatory in group settings) will take care of that type of validation.
Of course you won't have to change the properties of any existing screen fields nor will you have to rewrite any adapls, if you have a functioning application, but for new screen fields or existing screens fields that you'd like to turn into mandatory, adapl validated fields the new options will come in handy. For example, suppose you have an objects database in which object numbers are mandatory but do not need to be unique, while the user must get a warning each time he or she enters an object number which already exists in the database. This requires after-field validation by adapl (for which you'll have to write the code), but it also requires you to set the field to be mandatory.
Validation of the Mandatory requirement always takes place first. If it fails (because the field is still empty), the user will be warned if appropriate and the adapl won't be executed. If it succeeds, the adapl runs.
The Validation drop-down list still contains the old Run adapl before entering this field and Run adapl after leaving this field options for backwards compatibility. You'll never have to set both the adapl Validation property and the comparable adapl checkbox: unless you're willing to rewrite the relevant adapl, just leave the Validation property as is if existing fields have been set to run an adapl, and do not mark the new checkboxes. Only for new fields, preferably use the checkboxes for adapl validation and set the Validation property to any of the other (non-adapl) options.
This functionality applies to both Adlib for Windows and Axiell Collections. (As long as you do not mark one of the checkboxes, any other changes to the screen or its properties won't break backwards compatibility, so you'll still be able to open the screen in older versions of Adlib or Designer.)
Overridden fields in field lists displayed in ochre
In the database tree view underneath Fields and in the database Field list view in the Application browser of Axiell Designer, fields of which the properties are overridden in at least one dataset are now marked with a different colour (call it yellow, ochre, olive or gold) so you'll recognize them at once and know that you should first look up the relevant field definition underneath the relevant dataset since its properties have priority over the field properties on database level. (The possibility to override fields was in introduced in Designer 7.3.)
Documentation functionality in Designer expanded
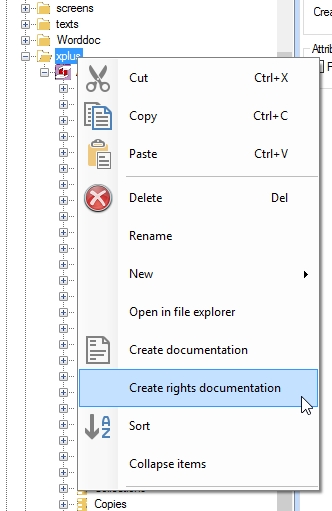
At folder level in the Application browser's tree view, the Create rights documentation option is now available. It harvests all roles/rights information for all files in the selected folder, that have actually been assigned access rights for some object. So users and their roles won't be listed here and roles (both application roles and user roles) will only show up in the documentation if they have been used to apply access rights to a data source, a method or other Adlib object in that folder. Right-click an Adlib folder (data, xplus, library or museum for example) and choose Create rights documentation in the pop-up menu.
The resulting documentation lists only objects for which access rights have been specified explicitly and sorts these per role.

Like other documentation created by Designer, you can save and/or print the generated file.
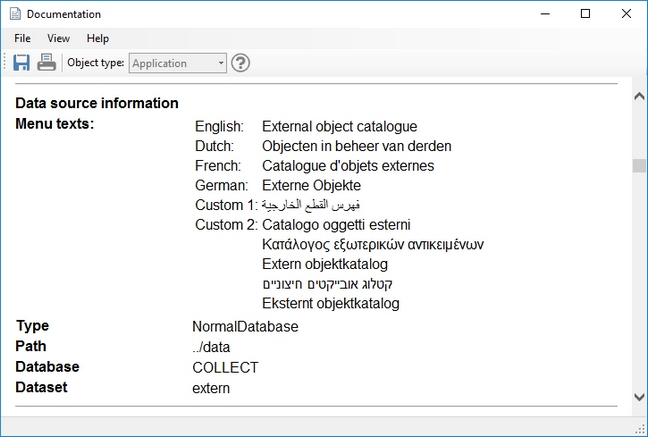
An improvement to the "normal" documentation generated by Designer is the addition of the database (.inf) name, any dataset and path to the database with which data sources in an application definition (.pbk) are associated. For example, right-click your application definition (this might be called something like Adlib Xplus 4.5, Adlib Library 4.2, etc.) directly underneath an Adlib application folder and choose Create documentation in the pop-up menu. Per data source in the application you'll now see the extra information.
Looking for output formats with the Object searcher
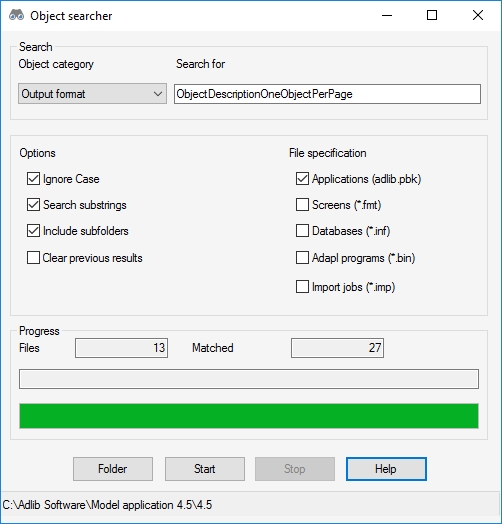
From 7.4 you can also search your Adlib objects for the file names of output formats (print adapls, Word templates and XSLT stylesheets). Open the Object searcher from the main Designer window (Tools > Object searcher), set the Object category drop-down list to Output format and behind it enter the file name you are looking for, with or without extension. Remember to mark the Search substrings checkbox (because the file name might be part of a path), the Ignore case checkbox and possibly the Include subfolders checkbox. Underneath File specification, only select Applications (the other objects do not have output formats).
Forcing a line break on brief display screens in Adlib
For brief display screens in Adlib there's a new option to force a line break between the displayed fields, using <br> as the text for an in-line label on the screen in design mode. You can implement a line break if you have at least two system fields specified on the relevant brief display screen and if the screen lists the fields to be displayed on the screen itself (as can be seen below) or if the fields to be displayed are listed on the List fields tab of the screen properties dialog. Since the latter option isn't used much any more, we'll show the set up for the first case.
First realize that a brief display screen always has one or more system fields (*A, *B, *C, *D and *E). These system fields function as sort of a place-holder for the actual field data while the number of system fields you place on the screen indicates how many lines Adlib will reserve for the data of each record listed in the brief display of a search result. So if you only have system field *A, only one line of text can be displayed per record, while *A and *B reserves two lines of text. If your brief display screen only contains *A, the displayed line of data in the search result can get as long as the Adlib window is wide: if you were to narrow that window, you would see that a long line of data would just be cut off when it no longer fits the width of the window. If you often work with narrow Adlib windows, adding the *B system field would already be beneficial: a long line of text would then be word-wrapped to continue on the second reserved line. In other cases though, where the Adlib window is wide enough and you don't need word-wrapping but you would like to spread the displayed fields per record over different lines, simply because you think it would improve readability and layout of the screen, then from Designer and Adlib 7.4 you can force such a line break if the screen has at least two system fields to display the extra line(s).
| 1. | Add any desired systems fields by right-clicking the screen and selecting New > System field in the pop-up menu. Click the new field and type the next available system field. So if *A is already on the screen, use *B next. Drag the new field underneath the already present system field(s). |
| 2. | Right-click the screen again and choose New > Label in the pop-up menu. Type <br> in the label. Right-click the label and also add <br> for the other available interface languages. |
| 3. | Move over some of the existing data fields and labels or make them a little less wide - this won't affect the available space for the fields on screen - and move your new <br> label to the place where you'd like to see the forced line break. |
| 4. | Save the changes to the screen.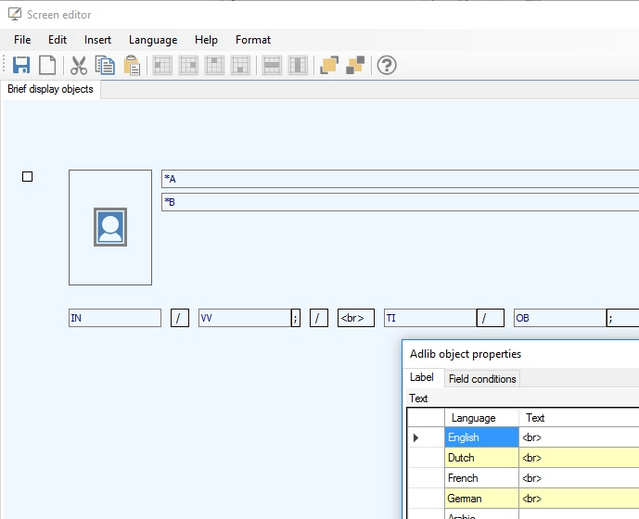 |
| 5. | After restarting Adlib, you can see the effect of your changes in a search result which uses the brief display screen that you adapted: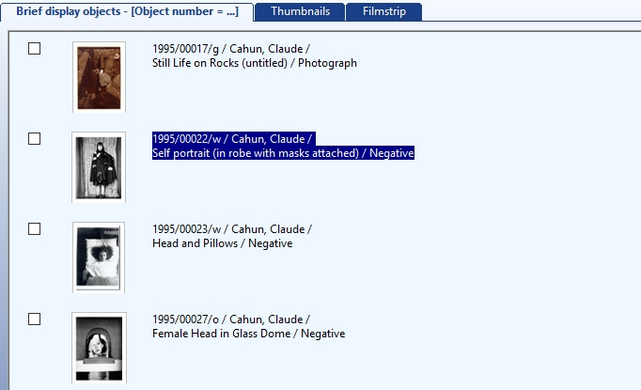 |
Format string also applicable to related and equivalent terms
The Hierarchy browser in Adlib displays all narrower and broader terms of the current term and you can expand the hierarchy by displaying related and/or equivalent terms as well. In the internal link definition for these types of relations you can set a Format string to specify which fields must be displayed in the tree structure, but previously this format string was only used for internal links of type 1 (broader and narrower). From 7.4 though, format strings set for internal links of type 2 (related) and type 3 (equivalent) are used in the Hierarchy browser as well.
More functionality in the Application tester
Axiell Designer has a special tool with which you can check your application for certain common errors. Start this Application tester tool from the main Designer window by selecting Tools > Application tester in the menu.

For all data fields (not system fields) on screens used in all data sources in an Adlib application, the Application tester now also checks if the tag associated with the screen field has been defined in the data dictionary of the database associated with the data source. In the past these undefined field tags have never been a problem, but in Axiell Collections a more strict validation of data structures has been implemented so that all tags used on screens need to have been fully defined in the data dictionary, providing the correct data type and such. So next time you use the Application tester on your applications, test results like the following might show up too, indicating that your application is not quite ready to be exposed via Axiell Collections:

So if you plan on deploying Axiell Collections or if you simply like your databases' data dictionaries to be in perfect order, you should take action on these test results. The solution is to create an actual field definition for all such reported fields in the relevant databases. From the label for the screen field, the screen(s) it is located on and the database the field should be specified in, you can usually easily deduce the basic properties for the new field definitions. However, if you think the Data type of a field should be anything other than Text, you have to be sure that all data that was entered into this field previously is indeed of the other type! Undefined tags on screens may contain any value because they are implicitly considered text fields, but once you specify the field in a database as an integer, numeric or date field, etc., then all existing data in that field should be of that type as well, otherwise you may inadvertently create data corruption. So if you are not sure about the type of your existing data in these fields, just assign them the data type Text, set the Maximum length to 0 (or otherwise sufficiently large) and let them be Repeatable. After you've defined all these fields in their respective databases, you're already done! There's no need for any data conversion or reindexing.
With regards to Adlib SQL databases the Application tester now also checks the following:
| • | Can a connection indeed be made to the SQL database? If not, please check the Data source name, Server, and User name and password settings in your Adlib database properties in relation to the settings made in SQL Server. |
| • | Does a data table for each Adib database (e.g. collect, thesau, etc.) exist? Data tables might still be missing for copied database definitions (.inf files), since those won't be created automatically when you copy a database definition. A SQL data table and some associated required tables can easily be created by right-clicking the new database definition and selecting Clear database in the pop-up menu. It won't create index tables, but you can easily create those after "clearing" the new database by reindexing all indexes for this new Adlib database. Be sure to apply the Clear database option only to the new database definition, not to your other Adlib database definitions as it will empty the relevant SQL tables! It would be wise to create a backup of your SQL database before using this option. |
| • | Do all index tables (e.g. collect_invo, thesau_term, etc.) exist? If SQL tables for certain indexes created in an Adlib database definition (.inf) are still missing, you can easily create the relevant tables by reindexing those indexes from within Designer's Application browser. |
Other new checks:
| • | Do all source and destination fields listed in the Copy fields from linked record box on the Linked field mapping tab have a field definition in the data dictionary? |
| • | Do all source and destination fields listed in the Write fields to linked record box on the Linked field mapping tab have a field definition in the data dictionary? |
folderId=%priref% in wwwopac.ashx image server calls
The folderId parameter is a new parameter for the wwwopac.ashx getcontent command, which can be used to reference a specific folder from which the images must be retrieved. This comes in handy in enterprise solutions in which each branch of your organisation uses its own images folder, while still addressing one and the same image server configuration in the adlibweb.xml file. Using this configuration (more specifically, the new <folderMappingList> setting in that file), the api indirectly identifies an images folder by means of the record number of the reproduction record linking to the image file. This is possible because the record number falls within a record number range which, together with the relevant image folder path, has been specified in this configuration.
For a wwwopac.ashx call that you may wish to set up in the Retrieval path and/or Thumbnail retrieval path properties of an image field, here in Designer, you can only make sensible use of the folderId parameter if the record number of the currently processed record in Adlib can be inserted in that call automatically. To do this, you can use the %priref% system variable: in this context, %priref% will always contain the current record number, so that the api can deduce from which images folder the requested image (specified with value=%data%) must be retrieved.
Example:
https://ourserver.com/wwwopacx/wwwopac.ashx?command=getcontent&server=images&folderId=%priref%&value=%data%&width=%width%&height=%height%