Release notes 7.17
Below you'll find a brief overview of new functionality implemented in Axiell Designer 7.17, including links to more information. We strongly recommend always using the latest version of Designer.
The Axiell software which needs to be updated to the latest version once new Designer settings have been applied (only if you have a license for that software of course) is the following: Collections, AdMove server, Workflow client, Ingest, WebAPI, SDK, AnalyzeData, Migration, ConvertInternalLinks, IndexCheck, InternalLinkCheck, LinkRefCheck, RemoveLanguageFromData, RemoveTagsFromData, DBtool and ValidateDatabase.
Using new (Collections-only) Designer settings in your application and database definitions will always break compatibility with older versions of Designer and Collections and other Axiell software* using the same BaseAPI, although removing those new settings will often restore that compatibility under the condition that the SQL table structures haven't changed because of those settings: if the SQL table structures have changed too, then a SQL database backup from before that change is required as well to go back to the previous state. The Designer release notes always note the compatible version of Designer and Collections, but this applies to below list of other Axiell software too. For a full list of compatibility issues through the different versions of Designer and Collections, see the Axiell Designer compatibility topic. The Axiell software which needs to be updated to the latest version once new Designer settings have been applied (only if you have a license for that software of course) is the following: Collections, AdMove server, Workflow client, Ingest, WebAPI, SDK, AnalyzeData, Migration, ConvertInternalLinks, IndexCheck, InternalLinkCheck, LinkRefCheck, RemoveLanguageFromData, RemoveTagsFromData, DBtool and ValidateDatabase.
Designer versions older than 7.7.1.316 (at least down to some versions of 7.6) and specific version 7.8.0.3855 should not be used: changing the database server name in a specific .inf would empy all translations from all enumerative field definitions in that .inf. This would not affect your existing data, but enumerative fields (drop-down lists) in Collections would no longer show user-friendly values. In Designer 7.8.0.3859 this bug was fixed again.
Version 7.6.19234.1 (as recommended for Adlib for Windows users) doesn't have the bug, so it can be used safely by Adlib users.
If enumerative field definitions still have their neutral values while they have lost their translations due to this bug, all these translations should be copied back to the relevant field definitions manually, using a backup of your application or an appropriate model application if you do not have a backup of your own application. Please contact our helpdesk for further assistance.
New settings in Axiell Designer pertain only to applications run within an Axiell Collections environment. If such new settings are applied, then the resulting application can no longer (reliably) be opened in Adlib for Windows. Since development of Adlib for Windows has ceased quite a long time ago, these new options are not supported by Adlib for Windows. Even if Adlib would ignore the relevant option, you could no longer reliably work in Adlib too, so altered applications using Collections-only functionality should never be opened in Adlib again.
Import.exe and thus the Designer import job editor/manager (because Designer effectively calls import.exe when an import job is being run) need to be able to read the .inf of the target database for the import. This is only possible if this software recognizes all options and object properties that might have been set in the relevant .inf. If an option or property isn't recognized, running the import job returns an error 172 (system file processed with newer version of software than version with which it was called). With the late 2022 introduction of importtool.exe (using newer technology) as an alternative for import.exe and the Designer import function, development on the latter import functionality has ceased. This has the consequence that when you use import.exe or the Designer import job editor/manager to run an import job for an .inf that has new options (say those that were introduced from Designer 7.6 and up), there's a chance you'll get an error 172 because import.exe has no support for the new property. In that case you'll need to start using importtool.exe to run your import jobs from now on. However, as long as you don't get the error, you can keep running your import jobs as you always did and you can even use the latest version of Designer for any changes to your application. Just keep in mind that you may activate a new option or property sooner or later, after which import.exe or an import with Designer will throw the mentioned error and you'll still have to move to importtool.exe.
Import jobs still have to be created in Designer (preferably use the latest version), so that doesn't change. Read more about importtool.exehere.
Contents
Multi-factor authentication setup changed
Changes in Users data source roles extraction
Designer indexing now uses IndexTool engine and UI
Index key size for alpha-numerical fields new maximum 200 characters limit
A quick tag/field search option
Improvements in the Create documentation window
ADAPL code editor improvements
RemoveTagsFromData to support priref ranges
2025-12-19: Release notes Axiell Designer 7.17
The following bug fixes and new functionality for Designer 7.17 and related tools have been implemented:
|
Bug report no. |
Short problem description |
| AX-664 | Designer couldn't save changes to an .inf file if the database type was AdlibFileShare (CBF). |
| AX-660 | The Save all button remained active even after you had just saved all modified files. |
| AX-654 | ImportTool couldn't write relations to a double-sided relation that uses indexed links. |
| AX-637 | ImportTool running a CSV import, was not honoring the "append" option, thereby overwriting occurrences. |
| AX-631 | IndexTool wouldn't complete index ISO dates properly. |
| AX-630 | Axiell Designer would fail to load a .pbk file with a URL in the output job template path. |
Multi-factor authentication setup changed
If you previously set up multi-factor authentication (MFA) as an extra security layer for users to log into Axiell Collections, so that after entering a user name and password on login the user was sent an e-mail containing an extra authentication code to enter before actually getting access to Collections, you’ll find that this functionality still works but only if you have made changes in the setup of MFA required by Collections 3.0. Without the required changes to an existing MFA setup, users won't be able to login. (If you didn't use MFA before, setting it up now is no requirement of course.)
You can leave the setup in the .pbk as it was, so with the (Two-factor authentication) Provider option set to Email and any SMTP server settings as they were (although the latter are not required for MFA in the new setup any more and will even become redundant in future versions of Collections where e-mail servers can only be configured in settings files). The Authentication method option, at the top of the Application authentication properties tab, can be left as is too, as long as it's either set to Adlib database, Active Directory or SingleSignOn. The authentication method requires a registered e-mail address with the other credentials for each Collections user (and e-mail addresses stored in a Users data source for Adlib database authentication should not have a "mailto:" prefix).
Then, for authentication types Active Directory and Adlib database, the easiest way to get MFA up and running again is to add a settings.json file in the \Configuration sub folder (really where settings.xml is located as well) of your Collections installation, with the following content:
{
	"EmailClients": {
		"MfaClient": {
			"Host": "myorganisation.mail.outlook.com"
		}
	},
	"Authentication": {
		"Multifactor": {
			"Email": {
				"Client": "MfaClient",
				"From": "noreply@myorganisation.com",
			}
		},
		"UserStore": {
			"Type": "Policy",
			"MfaPolicy": {
				"RequireMfa": true,
				"DefaultMfaMethods": [ "Email" ]
			}
		}
	}
}
The global EmailClients section defines a named e-mail client. If you want, you can name "MfaClient" differently (you can have unlimited e-mail clients). The Multifactor section, inside of the Authentication section, configures which e-mail client and “from” address to use for Email MFA. To force enable Email MFA for all users if not enabled in the .pbk, a MFA policy section is needed adjacent to the Multifactor section.
Just change the Host to the SMTP server name of your organisation and the From e-mail address to an applicable one, to ready your settings.json file quickly.
The \EmailTemplates sub folder of your Collections installation contains default e-mail templates in four interface languages. You can change their contents as you like or add extra templates in other languages: you cannot use any existing e-mail templates from pre-3.0 versions. Keeps backups of any edited templates in a separate location in case they ever get overwritten with the default templates again.
Recycle your IIS application pool and MFA should function again.
For more advanced MFA setups, we still recommend putting those settings in a settings.json file in the \Configuration sub folder and not put those settings in appsettings.json. Do see example.appsettings.json in the root Collections folder for documentation about all possible MFA settings.
For more information about the function of and the relation between the different settings file types available for Collections 3.0, please see the Collections installation guide.
(On a related note: password resetting is not functional in Collections 3.0 yet.)
Changes in Users data source roles extraction
From Collections 3.0, if you've set the Authentication method for your .pbk (the application definition file) to Adlib database (so your Collections application extracts user credentials and user roles from a Users data source inside the application), you must make sure that all roles registered in your Users database table, are registered as users with a role with the same name underneath the .pbk too. For example, if in your Users data source you've registered a user Ron with role Student, then underneath the .pbk check that you have a user named Student with role Student: you can add users by right-clicking the .pbk file and selecting New > User in the pop-up menu.
This is because roles from the Users data source that you wish to use in the application somehow, can only be known to a Collections 3.0 application (and be assigned access rights to) if they are registered in the .pbk too.
Similarly, but this is not new, if you've set the Authentication method for your .pbk to Active directory, and you'd like to be able to assign Collections access rights to AD groups, you'll have to register those AD groups as users in the .pbk with a role with the same name.
Note that it is not mandatory that the role has the same name as the "user" in the above described situations, but it makes keeping track of roles easier of course.
If you've set the Authentication method for your .pbk to Adlib database it is important that you check the above when installing Collections 3.0 because otherwise, if Users data source roles are not listed as users in the .pbk too, it is possible that users do not get their proper access rights assigned.
Collections 3.0 has the (paid-for add-on) option for integration with Microsoft SharePoint, meaning that if you employ SharePoint in your organisation, one or more application fields can be set up to store all uploaded files (or documents created by ADAPL) in SharePoint (instead of on a network drive, for example). With the upload, a link to the file on SharePoint will be created, so that by clicking the link or the download icon next to it, the end user opens it editable in Sharepoint if possible (like Word documents) or opens it read-only in the browser if the browser can display it (like a PDF). Because the files are stored in SharePoint, they can be accessed directly via SharePoint in your browser too.
Uploading a large file to Sharepoint will make saving the record take longer though.
A prerequisite is that your Collections application uses Single Sign-On (SSO) authentication through Microsoft Azure via the cloud.
Note that Collections can never remove an uploaded file from SharePoint and you shouldn’t clean up uploaded files in SharePoint directly either without also removing any links to those files from Collections too: there’s no synchronization between the two when it comes to deleting files or links to files.
Also, when SharePoint needs to convert a file to a current document type (like a .doc file to a .docx file) before the user can edit it in SharePoint, then the link in the Collections record will still point to the old (unedited .doc file).
When you are working in a Collections application which is installed outside of your organization’s local network, as is the case for all Collections applications hosted at Axiell for example, you normally can’t print to printers in that network: for security reasons, browsers run all web applications in a sandboxed environment isolated from the underlying operating system, making printers inaccessible on purpose to those web applications.
Collections 3.0 however, has the (paid-for add-on) option for so-called Universal Print, securely allowing you to print to local network printers from within hosted Collections applications. After your application manager/system administrator has set up one or more universal printers in Azure and the Collections configuration part has been done, the printers shared with you will show up in the Select printer dialog after clicking the Print… button for direct printing in the Output formats window. This type of printing works for Word templates, Excel templates, XSLT templates as well as ADAPL output formats.
A prerequisite is that your Collections application uses Single Sign-On authentication through Microsoft Azure via the cloud.
Also note that even when you’ve acquired this functionality from Axiell, actually using universal printing is not free either. Microsoft charges for print jobs (regardless of their size) that are sent to the Universal Print service. You will need to pay for job packages on a monthly basis, but some number of jobs is included in various 365 and Windows licenses. More information on this can be found here: Get access to Universal Print | Microsoft Learn.
Designer indexing now uses IndexTool engine and UI
Indexing almost all types of indexes from within Designer now uses the IndexTool user interface and engine, which is much faster than the old Designer indexing engine. Only indexed links are not supported by the new engine, so those will still (automatically) be handled by the old engine, although when indexing a single indexed link field, the old user interface will be used too.
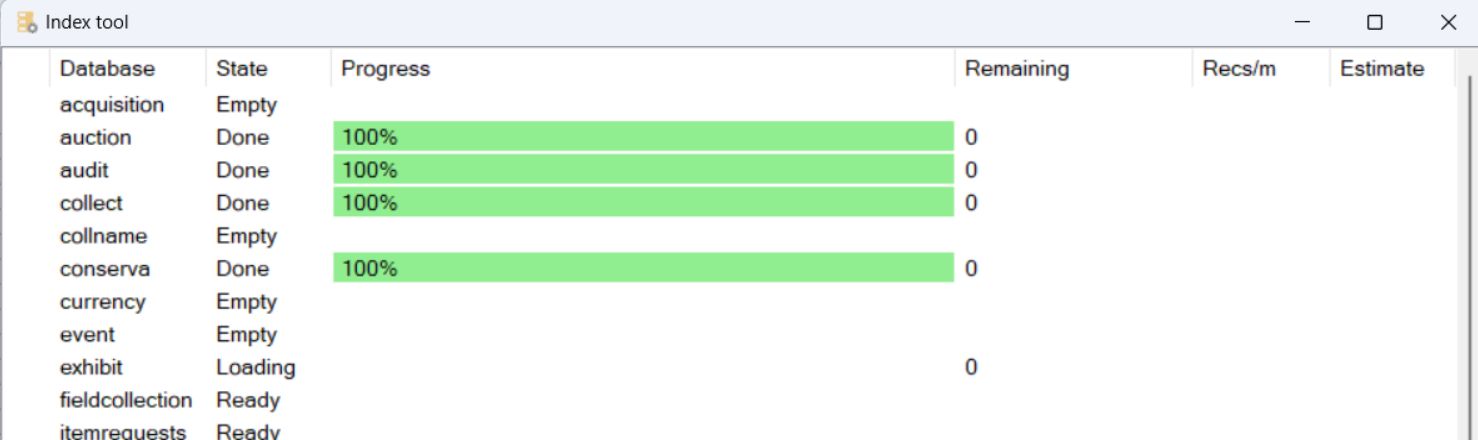
You can abort the indexing using the Abort button in the right bottom corner of the progress window. Resuming an aborted index procedure is not possible as it doesn’t use the continuation file.
And when using the Designer implementation of the IndexTool, any existing indexes can't be dropped before re-indexing. Error reports and other messages will appear in the main Axiell Designer window.
From Collections 3.0, the Record history and Field history functionality (as can be available from the Result set context toolbar and the right-click pop-up menu for a field in the Record details view), can be protected via access rights on a new method called Field history. This is useful because the record/field history may contain (privacy)-sensitive information which should not be accessible to all users.

Assign None access rights to hide the feature for all users with the relevant role: Full, Write and Read all enable the feature in the same way.
For backwards compatibility, without the method, all users will still have access to the functionality if available in the application. You'll have to add the method to each data source where you'd like to shield it from certain users and assign it access rights to roles in the usual way. With the method added, all roles which have not explicitly been assigned access rights to the method will have no access to the record/field history by default.
Index key size for alpha-numerical fields has new maximum 200 characters limit
From Designer 7.17 and the matching IndexTool version, the index Key size property for alpha-numerical indexes only, can be increased to maximally 200 characters (bytes). This can come in handy for alpha-numerical object numbers longer than 100 characters (the previous maximum), to ensure proper sorting even when the first 100 characters of certain object numbers are identical. After increasing this value, remember to reindex the index to adjust the relevant SQL table: all term columns in the index table will be resized to 200 bytes.
Note that reindexing the index to adjust the column length accordingly only works after having increased the length. For decreasing, the SQL table must first be removed from within SQL Server Management Studio and then reindexed with Designer or IndexTool, because otherwise the SQL index tables can’t deal with it.
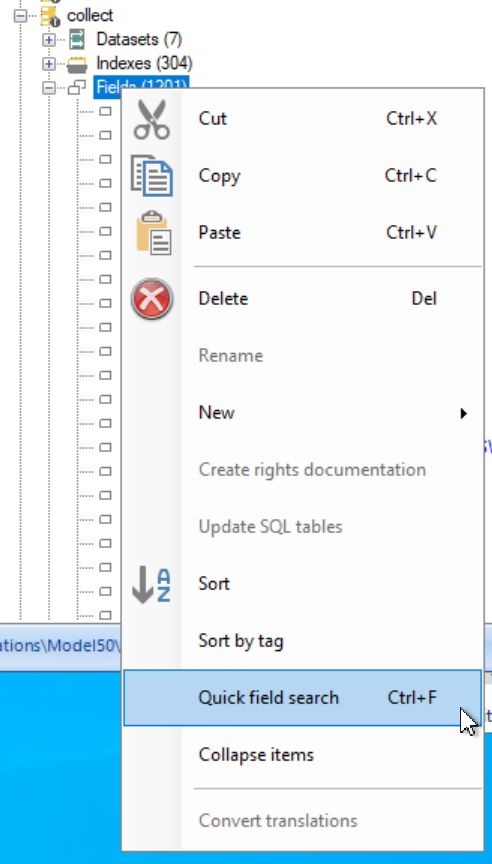
A quick tag/field search option
Finding a field name or field tag in the field list underneath an .inf node in the tree view is always a bit cumbersome: you have to sort the list and scroll to the desired field or use the filter option in the Field list. A quicker way has now been implemented, even if you know only part of the field name. Simply select either the database table (like collect or thesau for example) node, the Fields node or a single field in the tree view on the left of the Application browser en press Ctrl+F or right-click the database table node or the Fields node and select the Quick field search option in the pop-up menu.
The Find field window opens:
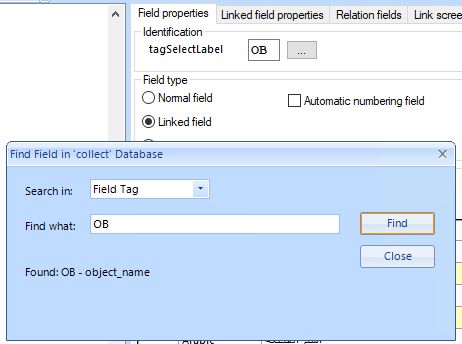
In the Find field dialog, first select whether you'd like to search on a tag or a field name, in the Search in drop-down. When searching on tag, type the entire tag and click Find. The search will be case-sensitive. If a single tag is found, this tag will automatically be selected in the tree view and its properties will be displayed on the right. Click Close if you don't need to search again.
When searching on field name, you will search case-insensitive in the currently set Application language and you can enter partial field names as well as more than one part (separated by spaces) that should appear in the field name together. (If for an object no value has been set in the current Application language, the English value will be searched instead.)

For the field name search, always a list with matching results will be shown, even if there's only one. Clicking an item in the result once will select the field node in the tree view and display its properties, and keep the current search dialog open, while double-clicking a field in the result list will select the field node in the tree view and display its properties, and close the current search dialog.
Clicking Close or pressing the Escape key will close the dialog without selecting a field.
Improvements in the Create documentation window
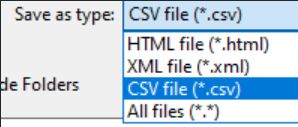
Some improvements have been made to the Create documentation window:
-
CSV file has been added as a file format option to store the created documentation in. When saving CSV documentation, the .csv file extension will automatically be selected.
-
At the bottom of the window a status text has been added to inform the user that a file has been saved successfully.
-
The currently selected ‘View’ is now correctly shown for all types when you click the View option.
Adapl code editor improvements
To make the option to edit adapl code in the Application browser code editor more attractive, a number or substantial improvements have been made.
As a reminder of the existing functionality: to edit an adapl, simply click an .ada file from the \adapls sub folder, to show the code in the right window pane of the Application browser. And to compile it, right-click the code and select one of the Compile options from the pop-up menu.
Menu bar and preferences
At the top of the editor you'll see a menu bar offering all available editor functionality and shortcuts: see further down for an explanation of all these functions.
Settings > Preferences can be used to set your editor preferences if you don't like the default behaviour - editor settings will automatically be saved to Designer’s preferences.xml file in the %appdata%\Axiell\Axiell Designer\ folder.
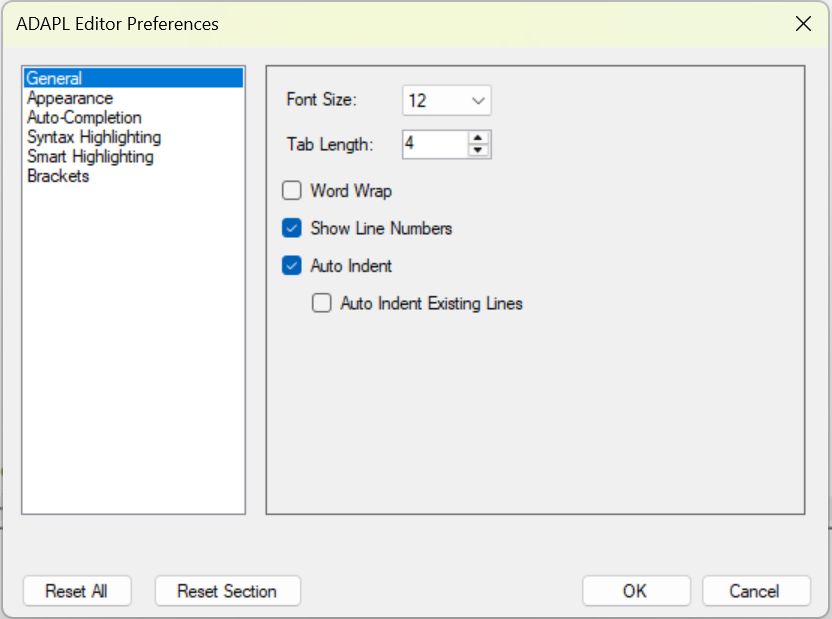
If you've changed any settings but would like to return to the default settings, then either use the Reset all button to reset al settings on all pages, or use Reset section to only reset the setting on the current preferences page. Always click OK to confirm changes.
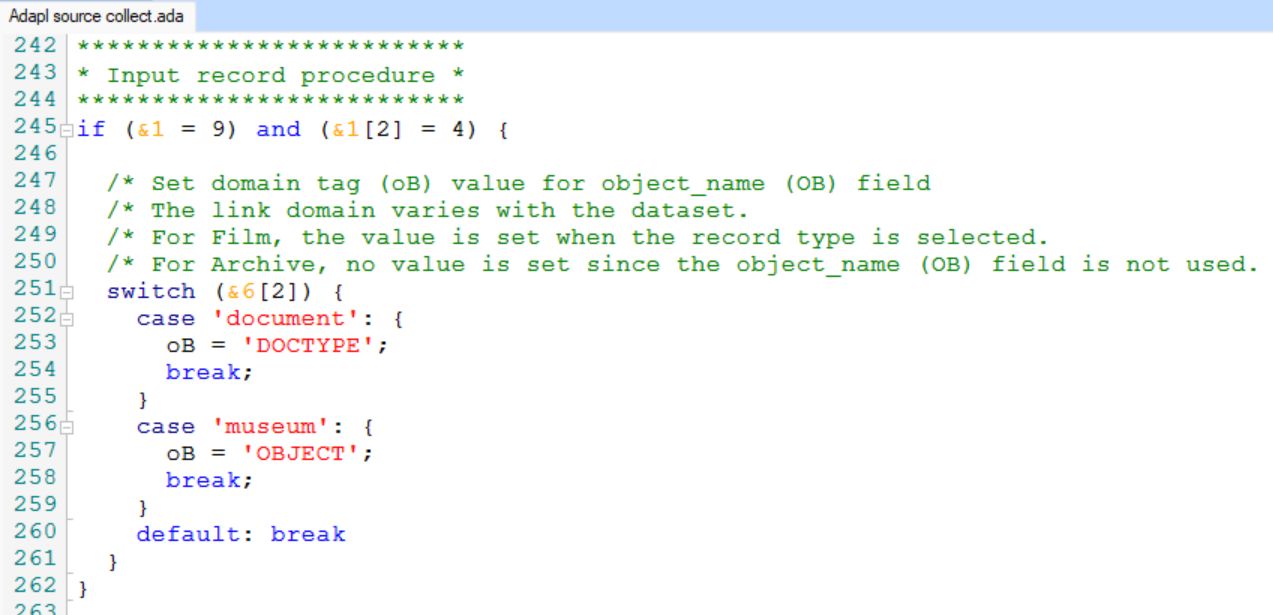
Syntax colouring
The colouring of different ADAPL syntax elements has been reimplemented, to make for a clearer overview.
If you don't like the default font colours, you can change them via Settings > Preferences > Syntax highlighting: click a coloured box to change the selected colour. The font type itself can be changed on the General tab.
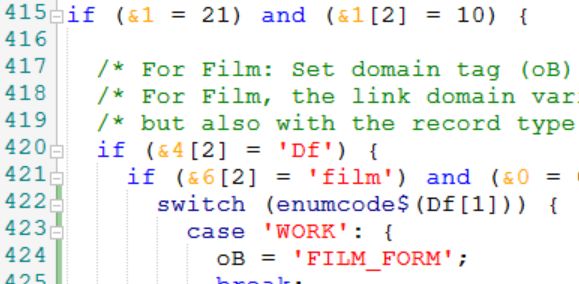
Line numbers
Line numbers are now present by default. This makes it easier to find a particular line if compiling the adapl reports an error in a certain line, and it also allows jumping to a certain line using the Shift+G key combination.
(Optionally, the display of line numbers can be switched off via Settings > Preferences > General > Show line numbers.)
Current line highlighting
The line which currently holds the cursor is now highlighted with a light blue background to make it stick out more.

If you don't like the default colours of certain editing aids, you can change them via Settings > Preferences > Appearance: click a coloured box to change the selected colour.
Selecting words and lines
Double-click a word in your code to select it, or click and drag across multiple words to select them all. You can also triple-click to select an entire line. You can use this for copying or deleting words or lines. When you select a word, automatically all other instances of that word in the code will be highlighted too (this is called smart highlighting): you can use this to quickly see where a certain variable is used in all of the code, for example. This behaviour can still be tweaked via Settings > Preferences > Smart highlighting.
Finding matching brackets
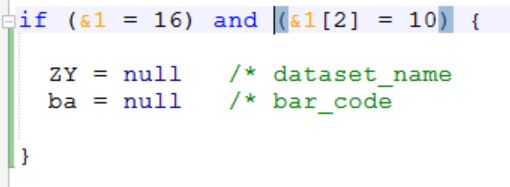
For nested code it's sometimes hard to find the matching bracket to an opening or closing bracket. In the new adapl editor you only need to click a (, ), { or } bracket (or right in front or after it, to get a blue highlight behind both the opening and matching closing bracket. Also, if the line that you clicked has a { or }, then a vertical green bar in the margin will indicate the beginning and ending of that code block, making it very easy to find matching curly brackets.
If you'd like other brackets types to show this behaviour, you can change the default types via via Settings > Preferences > Highlight brackets.
Auto-complete, tooltip functionality
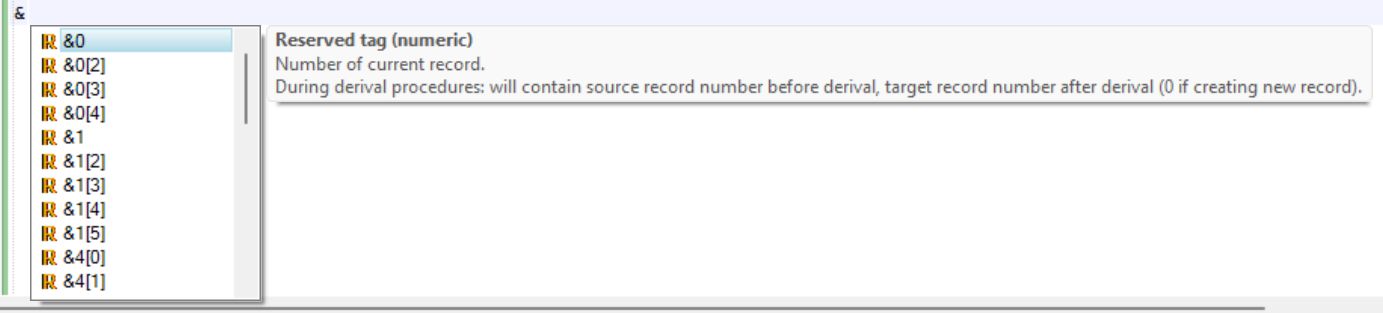
Auto-complete functionality for ADAPL keywords, functions and '&' variables has been added. So as you're typing your code, the editor will present a list of all the keywords, functions and reserved variables matching what you typed so far. You can scroll through the list using the mouse scroll wheel, by dragging the scroll bar in the list or by using your arrow keys and copy the highlighted item to your code by pressing Enter or by double-clicking any of the visible items. A tooltip explaining the selected item and showing its syntax is displayed as well.


Tooltips also appear when you hover the mouse cursor over an ADAPL keyword, function or reserved variable in existing code.

The auto-complete behaviour can still be tweaked via Settings > Preferences > Auto-completion.
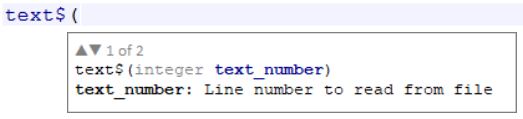
For ADAPL commands which take parameters, a parameters hints tooltip shows up as soon as you type the bracket behind the command. As you type the parameters/arguments for the relevant function the hints tooltip remains visible to provide help. It even keeps track of the position of the parameter you are currently entering and highlights the matching parameter in the hint in blue and provides a description of that parameter in the next line. For example, after typing ( behind enumval$, the source_text parameter in the hint is highlighted with its explanation underneath it, while after entering that parameter and having typed a comma, the tag parameter is highlighted.


If you stop entering parameters midway and return from elsewhere or if you'd like to see the hints tooltip again for existing code, then just put the cursor in the parameters for the function again and press Ctrl+Shift+Space.
If a function can be entered with different parameter lists, up and down arrows are visible in the hints tooltip. Click the arrows or press the up and down arrow keys on your keyboard to switch between the available hints.

Functions with a variable number of arguments of a single parameter are supported by the hints window too:

Optionally you can switch off the automatic showing of the hints tooltip, via the Auto-completion > Automatically show parameter hints menu. After switching it off, the hint can still be displayed manually by pressing the Ctrl+Shift+Space shortcut.
Auto-indentation
For certain keywords, auto-indentation has been implemented so you don't have to do that manually. For example: the lines after a line containing fdstart will automatically be inserted one tab to the right and that indentation ends when fdend has been typed.
The auto-indentation behaviour can still be tweaked via Settings > Preferences > General. (With Auto-indent existing lines switched on, an existing line of code will fall in line with other indentation of surrounding lines the first time you type something in front of the existing line which breaks proper indentation.)
Code folding
Code between curly brackets, between fdstart-fdend code blocks and subroutine declarations can be collapsed (be hidden from view) by clicking the folding marker icon (a minus symbol) in the line number column at the beginning of the code block. The vertical dotted line starting underneath the first character on that line indicates which code block will be folded: if you don't like these vertical lines being displayed, you can switch them off via Settings > Preferences > Brackets > Show folding lines. The first line of code remains visible but will be greyed out. Similarly you can unfold the hidden code section at any time by clicking the + symbol. For compiling it is not relevant if code sections have been hidden or not. You can use code folding to hide sections in which you're not interested at the moment, so you can focus more easily on a piece of code you're working on.

Syntax error marking for unclosed strings
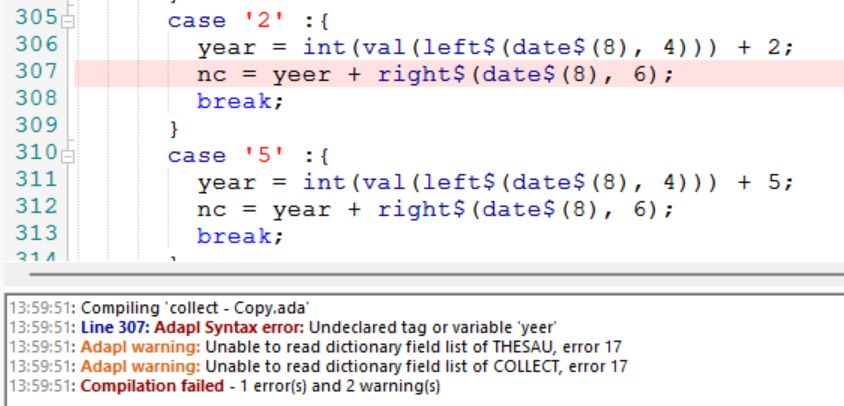
The editor now has the ability to detect certain syntax errors. Currently only unclosed literal strings are detected and will be marked with a red squiggly line. Move the mouse cursor over the relevant line to get a tooltip explaining the error.

Compiling
To compile an adapl, right-click the code and select one of the Compile options from the pop-up menu. In the bottom window pane, the result of the compile attempt is clearly shown: "Compilation failed" in red font type or "Compilation successful" in green font type. It also indicates if compiling was done in debug mode. If compiling failed, just double-click the line stating the error to have the code automatically scroll to the relevant line and select it for you, so you don't have to look it up yourself. The line with the error will be highlighted in light red at first, but will turn to purple once the entire line is selected.
Note that warnings, although deserving your attention, can typically be ignored if compilation is successful.
Hot keys
A number of hot keys\key combinations have been implemented to ease editing:
| Hot key\Shortcuts | Short description | Long description |
| Tab | Increase indentation | This works from the cursor position or for a selection of lines to indent multiple lines at once. The indentation equals four spaces by default, but you can change that via Settings > Preferences > General > Tab length. |
| Shift+Tab | Decrease indentation | This works from the cursor position or for a selection of lines to decrease the indentation of multiple lines at once. The indentation equals four spaces (or less if character position 1 is reached). |
| Ctrl+G | Jump to a specific line |
Enter a line number for the cursor to jump to when clicking OK. By default the current line number is entered. The maximum line number range in the current adapl file is displayed between brackets.
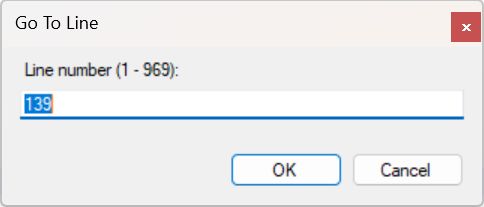 |
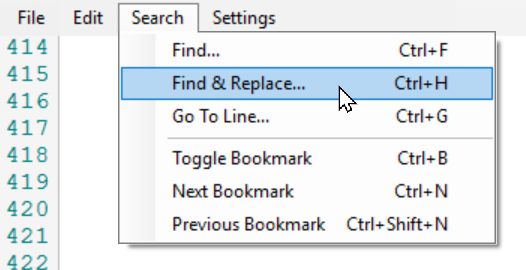
| Ctrl+F | Find a piece of code or text |
Enter any partial or complete string to search for in the code and comments and optionally mark Match case or Match whole word. You can also (instead) enter a regular expression, but then do mark the Regex checkbox. Click Find next to start the search. The dialog remains open so you can click Find next repeatedly to find each following occurrence of the string. You can edit the code while the dialog is open.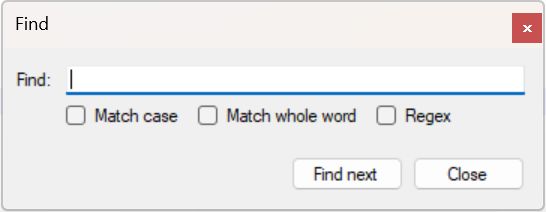 |
| Ctrl+H | Search and replace code or text | In the Find box, enter any partial or complete string to search for in the code and comments and optionally mark Match case or Match whole word. You can also (instead) enter a regular expression, but then do mark the Regex checkbox. Optionally, enter a replacement string in the Replace box. Click Find next to start the search. The dialog remains open so you can click Find next repeatedly to find each following occurrence of the string. As soon as you find the string occurrence to replace, click the Replace button. If you are sure that you'd like to replace all occurrences of the string in Find, you can click the Replace all button. If you leave the Replace box empty, you'll replace a found string by nothing (so the string will be removed). You can edit the code while the dialog is open.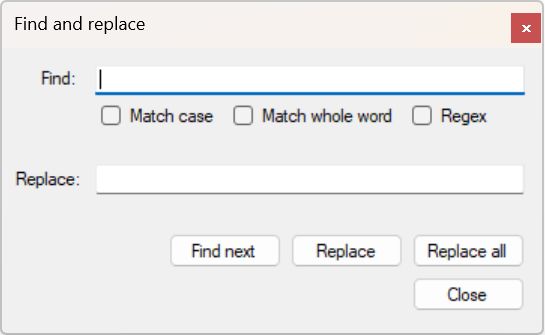 |
| Ctrl+arrow left, Ctrl+arrow right | Go to word on the left or right | If you are using the arrow keys to move the cursor through a line, you can do this quicker by also pressing the Ctrl key. |
| Ctrl+U, Shift+Ctrl+U | Converts selected text to upper or lower case | |
| Ctrl+B | Adds or removes a bookmark in the current line | A bookmark can be used to remember a line or piece of code to look at. A bookmark is indicated by a purple dot behind the line number. |
| Ctrl+N, Ctrl+Shift+N | Navigates to next or previous bookmark | |
| Ctrl+Z, Ctrl+Y | Undo or redo your changes |
This functionality now has a much longer history, so more changes can be undone or redone. |
| Ctrl+Shift+C | Comments out or uncomments selected lines | Using this shortcut, selected lines will be commented out with /* if they are currently not commented out, while selected lines will be uncommented if they are currently commented out. If you select normal lines and commented out lines together and use this shortcut, the first selected line will be leading in what happens to all of the selected lines. |
Detection of external modifications
Whenever the file that you are currently editing has also been edited and saved in a different program at the same, the ADAPL editor will notice this automatically and will ask you if you'd like to reload the file with the saved changes from the other program (and lose changes here that you didn't save yet) or not. In case you choose No, you'll keep working in your currently loaded version and when you save it, this version will overwrite the file saved by the other program.
Note that the File menu and the right-click pop-up menu also offer you the possibility to reload the .ada file from disk manually. You can use this function if you want to undo a lot of changes since your last save and start fresh with the most current save.
RemoveTagsFromData to support priref ranges
The separate Removetagsfromdata tool (not included with Designer) now supports priref ranges to allow you to remove tags and their content from specified records, instead of from one or more database tables at once. This way you can perform the operation on a dataset in a database table too, if you know the record number range for that dataset.
The RemoveTagsFromData.exe tool can be called from the operating system command line with the following syntax:
RemoveTagsFromData <data folder> [fix|check] [database table list | *] [tag list | *] [priref]
-
[priref] (optional) is either the record number of a single record from which the specified tags have to be removed, a comma-separated list of prirefs (separate only by a comma and use no spaces) or a range of prirefs (provide the first and last priref in the range and separate them by a hyphen without spaces around it). The list and range options are available from RemoveTagsFromData version 1.12.1.4879. By default (without providing any prirefs), the tool works on all records in the provided databases. Entering an asterisk at this position also performs the operation on all records.