User authentication and access rights

Contents
Collections offers application user login functionality - the user can never open Collections without logging in, implicitly (via the optional single sign-on or explicitly - and a comprehensive access rights mechanism to define precisely which users have what rights when they're working with Collections. This functionality extends the standard Windows sign-on authentication, which of course should always be the first line of defence.
User authentication through application user login
With any of the standard login procedures for Collections (except for single sign-on), a login window appears after starting each (instance of an) application in which the user must enter his or her user name (possibly preceded by an Active Directory domain and a backslash) and a password. No access will be granted to the application until the user fills in the correct information.
You, or your system administrator, has to set up application authentication explicitly. Make this setting on the Application authentication tab of the properties of an application structure file (.pbk) that you have opened in the Application browser in Designer. So, per application you have to set this up.
First choose one of six possible methods for saving the user names and passwords:
| • | None - the (for Collections) inappropriately named "None" option, means that Collections will validate an entered user name and password to user credentials from the local machine or Active Directory. The relevant credentials will then be used too for applying any security policy through access rights and roles. Users must still be linked to roles (user roles can be used to apply access rights to the different parts of your application and/or databases), which can be done in the application structure (.pbk). |
| • | Adlib database - store user names, passwords, roles (optionally) and application ids (optionally) in one of your Collections database tables. You'll probably have to adjust your application (by creating new fields in a table like people.inf or by including a ready-made users database table) to make it possible to enter this information in the database. You'll then have to fill in the other options on the current properties tab. Choose the Database to which you have added the fields, by clicking the … button. The path will then be filled in automatically in the Folder property. If necessary you can also choose the proper dataset. Also select the data dictionary fields that you've created for the user name, password and possibly role, in the User id field, Password field and User role field options (use the … buttons next to them). If you have more than one Collections application and certain users must have different roles in different applications, then you'll have to add a fourth field to your user data, namely an application id field. Every application must have been assigned its own unique application id which can be referenced in your application id field. By grouping your new user role and application id fields in the datadictionary and making this group repeatable on the screen, you allow for the possibility of each user having a different role in every application. On the Application authentication tab you must now set the Application Id field you implemented. For each user a record must then be created that at least holds information in the user name and password fields. The user names may be different from user names for the general Windows login, but user names need to be unique. The Change/Reset password functionality as well as two-factor authentication can be set up for this authentication method. |
| • | Active Directory - store user names, passwords and possibly e-mail addresses in Active directory user accounts: Active directory is the basis for distributed networks on Windows systems and in it a system administrator can create accounts for a/o all system users. Users must still be linked to roles for applying any security policy in Collections itself, which can be done in the application structure (.pbk). The Change/Reset password functionality as well as two-factor authentication can be set up for this authentication method. |
| • | HTTP - this option cannot be used in Axiell Collections. |
| • | Single SignOn - using the user authentication services of an external so-called identity provider like Azure Active Directory, Collections applications can be set up for single sign-on functionality. After a proper setup, this option allows the user to log into Collections without login dialog if he or she is already logged into a different online application in that browser using the same identity provider. The use of external authentication services is not included in your Axiell license and setup of this functionality is complex, so please consult the Axiell ALM Sales department for more information. |
Save the edited pbk file after you have set an authentication method, recycle the IIS Collections application pool and start the concerning application to test your settings.
Note that, whatever way you choose to have users log in, the name with which the user logs in will be used to assign access rights through the roles mechanism (if that is used in your application). So make sure that any user names linked to roles, match the user names as registered in the authentication model that you chose.
The Collections access rights mechanism
In the Collections access rights mechanism, screen files, objects in a database definition (namely database tables, datasets and fields), and objects in an application definition (namely the application, data sources, methods, export jobs, output jobs and friendly databases), can all be protected. (Methods are both access points and software functionality like searching in different ways, creating new records, deleting records, using saved searches, global updating, importing, exporting, and deriving.)
In Axiell Designer this can be set up in the following ways, that may be combined:
The user credentials required for this mechanism to work, are obtained from the Windows user authentication if no Collections application user authentication has been applied, otherwise the latter provides the necessary credentials.
In an application definition you can include a list of all users of the application. In the properties of each user you then assign a so-called role to which the user belongs (such as staff, user, public, etc.). Then you may include any role on the Access rights properties tab of a Collections application object (as listed in the introduction above) and assign access rights to the role. Access rights that are applied this way, apply not only to the file or object itself but also to all sub-objects in it, which saves you work. And access rights that you apply to roles for objects in an application definition can only be further restricting than any access rights applied to the same roles for objects in a database definition; they can never be extended.
One special role is $REST. This role should never be assigned to users explicitly. Its purpose is to be able to specify access rights to the current object for all users who's role has not been assigned access rights to this object and for all users without a role. So if you've defined users and roles in the pbk, but for an object you do not assign access rights to these roles, while you do specify that $REST should get e.g. read access, then all users will have only read access. However, by default $REST has not been set anywhere, and if you do not assign access rights to any roles, then all users will have full access.
A second special role is &ADMIN. This role should be assigned to administrator users, but access rights must never be applied explicitly to this role because users who get the $ADMIN role have full access rights by default and even the right to change the name of the record owner and user access rights per record if record authorisation is active for the database. The $ADMIN role and its inherent rights also have priority over access rights assigned to $REST. Prior to Collections 1.17.2, this $ADMIN role also always overruled any restricting access rights on elements of the application based on the application id: each Collections application (library, archive, xplus etc.) has its own id and this id combined with limiting access rights is commonly used in our model applications to hide certain data sources, access points or fields from view because they have no place in that particular application while they do in some other application. Because those application id-based access rights were always overridden, $ADMIN users would not only get the extra functionality but also some out-of-place data sources and such, causing a confusing impression. This has been remedied in Collections 1.17.2 so that $ADMIN users get to see the application as intended while still having access to the extra administrator functionality.
Certain Collections functionality (like Record history reporting, View/recover deleted records (aka Journal maintenance) and View active sessions) is normally only available to user with the $ADMIN role. To allow other (non-administrator) users to get access to some of these specific functions too, Axiell Designer 7.13 and up allow you to add these functions as so-called application features to a .pbk and specify access rights for roles like you would for methods for example. Click here for more information.
Note that on opening of the Application browser, it only loads application objects from the currently set root folder in memory; any objects in a sub folder will only be loaded too, if you open that folder. The advantage of this is that the start-up time of the Application browser is being reduced. Other than that, it is only relevant for your work when you are editing access rights for application or database objects: in the Roles drop-down lists that you encounter on those properties tabs you'll find all harvested roles from all currently loaded application objects (so you won't have to remember them or look them up all the time). But to allow Designer to harvest all roles from database and application objects, you must have opened the data and application folder(s) nodes at least once in this session, and they will remain in memory when you close those nodes again.
Access rights and roles, for methods - If you are about to apply access rights to roles for methods, you'll find there are many combinations of method type and access rights of which the consequences may not be immediately clear. Therefore, the following table provides an overview of all possible combinations and their consequences.
For instance, if you set a method of the Delete records type (because you want at least some users to be able to remove records from the current data source), and you have specified a number of users that fall into two roles, staff or public, you may assign the public role any of the access rights None, Read or Write because they have the same effect that records cannot be deleted. Because staff must have Full access rights for this method, you don't need to assign these: Full access rights are applied to any role for a method by default (unless the application's default access rights have been restricted), if a role's access rights have not been set for this method.
Everything in the table in light green is staying on the safe side, disabling functionality or different types or searching; everything in cyan means enabling some or all functionality of that method.
Access rights
Method type |
None |
Read |
Write |
Full |
Term search |
Searching is not allowed. |
Searching is allowed. |
Searching is allowed. |
Searching is allowed. |
Free text search |
Searching is not allowed. |
Searching is allowed. |
Searching is allowed. |
Searching is allowed. |
Create new records |
Creating a new record in the current data source is not possible. |
Creating a new record in the current data source is not possible. |
Creating a new record in the current data source is allowed. |
Creating a new record in the current data source is allowed. |
Search language |
Searching with the search language is not possible. |
Searching with the search language is allowed. |
Searching with the search language is allowed. |
Searching with the search language is allowed. |
Delete records |
Records in the current data source cannot be deleted. |
Records in the current data source cannot be deleted. |
Records in the current data source cannot be deleted. |
Records may be deleted from the current data source. |
Pointer files, (aka saved searches) |
No access to saved searches. |
Saved searches can be read, but not written out, nor deleted. |
Saved searches can be read and written out, but not deleted. |
Saved searches can be read, written out and deleted. |
Global Update |
Global update is not allowed. |
Global update is not allowed. |
Global update is permitted. |
Global update is permitted. |
Print records |
Records cannot be printed. |
Printing is permitted. |
Printing is permitted. |
Printing is permitted. |
Export records |
Records from the current data source cannot be exported. |
Exporting is allowed. |
Exporting is allowed. Export jobs may be saved but not deleted. |
Exporting is allowed. Export jobs may be saved and deleted. |
Import records |
Importing records into the current data source is not possible. |
Importing records into the current data source is not possible. |
Importing records into the current data source is permitted. Import jobs may be saved but not deleted. |
Importing records into the current data source is permitted. Import jobs may be saved and deleted. |
Derive records |
Deriving records into the current data source is not permitted. |
Deriving records into the current data source is not permitted. |
Deriving is permitted, but the original record cannot be deleted. |
Deriving is permitted and the original record may be deleted. |
Date range search |
Searching on a date range is not permitted. |
Searching on a date range is allowed. |
Searching on a date range is allowed. |
Searching on a date range is allowed. |
Fixed query |
Searching with a fixed query is not permitted. |
Searching with a fixed query is allowed. |
Searching with a fixed query is allowed. |
Searching with a fixed query is allowed. |
Bulk insert |
Bulk insert is not available. |
Bulk insert is not available. |
Bulk insert is available. |
Bulk insert is available. |
Simple search |
Simple search is not available. |
Simple search is available. |
Simple search is available. |
Simple search is available. |
Copy record |
It's not possible copy records. |
It's not possible to copy records. |
Copying records is allowed. |
Copying records is allowed. |
Record templates |
Not possible to use records templates. |
Not possible to use records templates. |
Record templates can be used. |
Record templates can be used. |
RecordMerge |
Merging records is not possible. |
Merging records is not possible. |
Merging records is not possible. |
Merging records is possible. |
The application Identification role - A different type of role is the application Identification property. You do not assign users to this role, because this role automatically applies to everyone using that application! With this role, a standard screen for instance, may be read-only in one application, whilst it may be editable in another application.
More details - See the Help topics for the Access rights tab in the properties of a specific application object, for detailed information about access rights for that particular object.
Generating an overview of applied access rights
From Designer 7.4, the Create rights documentation option is available at folder level in the Application browser's tree view. It gathers all roles/rights information for all files in the selected folder, that have actually been assigned access rights for some object. So users and their roles won't be listed here and roles (both application roles and user roles) will only show up in the documentation if they have been used to apply access rights to a data source, a method or other application object in that folder. Right-click a folder (data, xplus, library or museum for example) and choose Create rights documentation in the pop-up menu.

The resulting documentation lists only objects for which access rights have been specified explicitly and sorts these per role.
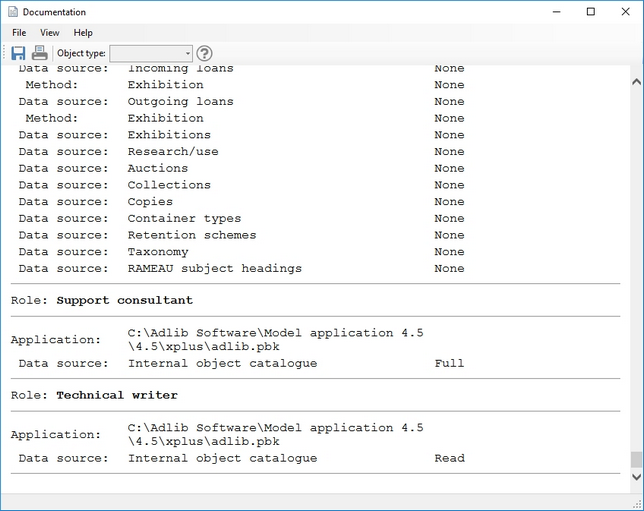
Like other documentation created by Designer, you can save and/or print the generated file.
Adjust the standard security for an application
In the Default access rights property of an application definition, you may set the standard access rights for this application, that must apply if no access rights have been set for an object through the roles functionality. If a role and access rights have been mapped for any application object or database object, then those access rights always have priority over the Default access rights for the application (whether those role-specific access rights allow more or fewer user actions than this default).
Use the authorisation functionality
With this method of security you can set access rights per record per user or role. In each record you then list users and/or roles* that have different access rights from the norm. This is useful if some records in a database may only be accessed by some employees because of sensitive contents for example, while other records may be accessed freely.
There are two different ways of implementing this functionality:
| • | The first is a general way with which you can either: - completely Exclude the users or roles listed in the record and hide this record from them, while to all other users any other access rights settings apply; - or instead allow (Include) the users or roles listed in the record (and those users and the record owner only) full access to this record while excluding all other users implicitly. This has to be set for the database as a whole, so you can't decide per record that you now want to enter an exclude list, and for another record an include list because that would be the least amount of work in both cases. If one of both mentioned access rights extremities is all you need for a database, then use the Exclude or Include method, since this is quicker to implement and easier to use. |
| • | The second way is more specific and eliminates the limitations of the first implementation. This has taken shape in the third Authorisation type called Specified rights. Choose this type if you want to be able to indicate per record which users or roles have which specific access rights (None, Read, Write or Full, representing the actually stored values 0, 1, 2 or 3 respectively). With the Specified rights method, the initial creator of a record (a user or role), the so-called Record owner, always has full access to that record, and in this record only the creator is allowed to set and change which users have which access rights, or transfer the record to another record owner. The latter is necessary for instance when the current record owner is a user and this user changes employment; using a role as record owner instead circumvents this problem because if records are property of a role, an application manager with access to Axiell Designer can always assign that role to other users so that they also get the right to adjust the access rights of others to the relevant records. |
* You can only use a user name in this functionality if no role has been assigned to that user in the application definition (whether that role is actually used anywhere else or not). This is because when Collections searches for access rights to apply, it searches by means of the role assigned to a user. So if a user James has the role Management and you apply the authorisation functionality discussed here, you will have to enter the Management role in records instead of user name James. Of course, then the record access rights apply to all users with the Management role, not just to James. Users without roles however, can indeed be entered in records; you can mix user names and roles here.
All applicable database settings can be found in the Authorisation and security box on the Database properties tab for a selected database in the Application browser. So you decide per database which authorisation method you want to use (or none at all of course).
- Implementing general authorisation through Exclude or Include
| 1. | Firstly, in the data dictionary of the desired database you must define an new text field that can hold user names and roles. |
| 2. | Secondly, an entry field associated with this database field, must be placed on one or more screens that are used in the current application to access this database. |
| 3. | In the properties of this database you can specify the Authorisation user field that you defined in step 1, and its type (Exclude or Include). When creating or editing each record, the user must supply the names of all users or roles to which he or she wants to apply the Exclude or Include authorisation that you set here. Exclude is analogous to None access rights; Include is analogous to Full access rights. You choose the type on the basis of the smallest number of user names or roles that would apply to it. For instance, if there are just a few people that you want to exclude from some records, you choose the Exclude type. For the appropriate records you only have to provide the names or the roles of these few people each time. Users that are excluded through authorization from seeing certain records cannot acquire Read, Write or Full access rights through any of the other security functionality in Collections. |
- Implementing specific authorisation through Rights
| 1. | Open the drop-down list Authorisation type and choose the Specified rights method. |
| 2. | The Default access rights concern the access rights for all users to a record in which those users or roles have not been explicitly assigned access rights. If you are more likely to list users or roles in a record, that have extensive access rights like writing or also being allowed to delete, then for this option you'll probably want to set limited default access rights, like read-only or no access at all. The reverse situation will probably occur less often. But it is of course important to choose these default rights carefully, because you won't be listing the majority of users or roles in each new record. |
| 3. | For the other three options you set three different field names. The Authorisation (user) field already existed before 6.1.0 and may already be filled in; if so, then leave it as it is, if not, then fill in a new field name or tag. Later, in this field in the running application, the user names or roles will be filled in of users to whom the creator of the record wants to assign specific rights. (User names are dependent on the authentication method that your application uses.) |
| 4. | For the Authorisation rights tag, fill in a new field name or tag. In this field, per user or role the specific access rights will be stored that are assigned by the creator of a record. This should be an enumerative field with neutral values 0, 1, 2 and 3 and at least English Language values None, Read, Write and Full respectively (so 0 is None etc.). |
| 5. | For the Record owner tag, also fill in a new field name or tag. Later, in this field the user name or role of the creator of a record will be stored automatically. This name or role is determined through the login of the current user. |
| 6. | For Record owner type, choose between Current user (the creator of a record will be its owner) and Current role (the role of the creator of a record will be its owner). If the access rights of the record owner are based on an Active Directory membership, then for Axiell Collections the Record owner type must always be set to Current role. |
| 7. | For the three or two new fields you'll also have to make data dictionary definitions. Create these new fields in the field list of the current database. All three must be normal text fields that you may give a limited length because these fields only need to contain names or access rights. The fields are not linked or enumerative: the access rights field for instance, will be provided with an access rights drop-down list automatically, you don't need to specify this yourself. What is important though, is that the user/role field and the access rights field must be repeatable and that these fields must be defined in a data dictionary field group together! |
| 8. | Now the database side is finished. Next, you'll have to create a new screen or adjust an existing screen, on which these fields must be filled in later on. Let's assume that you adjust an existing screen. Management details for instance, would be quite suitable for this purpose. Open the desired screen in the Screen editor in Designer. If the user field is not yet present on the screen, then insert three screen fields (otherwise two) with accompanying labels, that you associate with the data dictionary fields that you created in the previous steps. You can leave all screen field properties to their default values. |
In the running application, only the owner of a record (a single user or all users with a certain role) can fill in or change the three new fields. All other users can never adjust the contents of these three fields (unless there is no owner at all). If they have access to the record, then at the most they can read these fields, even if they have full access.
Each time that a user now tries to open and/or edit a record in this database, Collections will check if that user has the proper access rights.
Use Active Directory groups in defining roles
The Active Directory (or Windows NT) group to which a user belongs, can be used to specify the access rights for an application object. This way you only need to register the individual users in the appropriate Active Directory groups and then register those Active Directory groups in the Collections application definition. Simply include the group name in the Users list of the relevant Collections application definition and assign it an appropriate role. For the WebAPI to be able to apply access rights to such users, the role name must be identical to the Active Directory group/Collections user name because the WebAPI has no access to the application definition containing the Collections user-to-role mapping and can only use the Active Directory group name of the logged-in user as a possible Collections role (access rights in Collections are always assigned to roles). So we recommend that when you include an Active Directory group name as a Collections user in the application definition, you assign it a Collections role with exactly the same name.
The Collections security system will then not only check the Collections access rights of the Collections role for the specific Active Directory group (specified as Collections user), but also the Windows access rights for the Active Directory group under which the current Windows user falls. The most limited access rights of the two will be used if more than one restriction is used.
For example, the Active Directory group students may have Write access (on Windows/SQL level) to a specific Collections SQL database, but "John", who is a member of that group may have only Read access for a specific field in Collections. In this case (for safety reasons) the Read access has priority as far as the relevant field is concerned. In this example, a Collections user named students with the role students has been specified in the application definition and the relevant data dictionary field has been assigned Read access rights for the role students.
If a user is linked to several NT or Active Directory groups, the individual rights are assigned to the group in which the user has the most rights. Individual rights always take precedence over group rights.