Release notes 7.15
Below you'll find a brief overview of new functionality implemented in Axiell Designer 7.15, including links to more information. We strongly recommend always using the latest version of Designer.
The Axiell software which needs to be updated to the latest version once new Designer settings have been applied (only if you have a license for that software of course) is the following: Collections, AdMove server, Workflow client, Ingest, WebAPI, SDK, AnalyzeData, Migration, ConvertInternalLinks, IndexCheck, InternalLinkCheck, LinkRefCheck, RemoveLanguageFromData, RemoveTagsFromData, DBtool and ValidateDatabase.
Using new (Collections-only) Designer settings in your application and database definitions will always break compatibility with older versions of Designer and Collections and other Axiell software* using the same BaseAPI, although removing those new settings will often restore that compatibility under the condition that the SQL table structures haven't changed because of those settings: if the SQL table structures have changed too, then a SQL database backup from before that change is required as well to go back to the previous state. The Designer release notes always note the compatible version of Designer and Collections, but this applies to below list of other Axiell software too. For a full list of compatibility issues through the different versions of Designer and Collections, see the Axiell Designer compatibility topic. The Axiell software which needs to be updated to the latest version once new Designer settings have been applied (only if you have a license for that software of course) is the following: Collections, AdMove server, Workflow client, Ingest, WebAPI, SDK, AnalyzeData, Migration, ConvertInternalLinks, IndexCheck, InternalLinkCheck, LinkRefCheck, RemoveLanguageFromData, RemoveTagsFromData, DBtool and ValidateDatabase.
Designer versions older than 7.7.1.316 (at least down to some versions of 7.6) and specific version 7.8.0.3855 should not be used: changing the database server name in a specific .inf would empy all translations from all enumerative field definitions in that .inf. This would not affect your existing data, but enumerative fields (drop-down lists) in Collections would no longer show user-friendly values. In Designer 7.8.0.3859 this bug was fixed again.
Version 7.6.19234.1 (as recommended for Adlib for Windows users) doesn't have the bug, so it can be used safely by Adlib users.
If enumerative field definitions still have their neutral values while they have lost their translations due to this bug, all these translations should be copied back to the relevant field definitions manually, using a backup of your application or an appropriate model application if you do not have a backup of your own application. Please contact our helpdesk for further assistance.
New settings in Axiell Designer pertain only to applications run within an Axiell Collections environment. If such new settings are applied, then the resulting application can no longer (reliably) be opened in Adlib for Windows. Since development of Adlib for Windows has ceased quite a long time ago, these new options are not supported by Adlib for Windows. Even if Adlib would ignore the relevant option, you could no longer reliably work in Adlib too, so altered applications using Collections-only functionality should never be opened in Adlib again.
Import.exe and thus the Designer import job editor/manager (because Designer effectively calls import.exe when an import job is being run) need to be able to read the .inf of the target database for the import. This is only possible if this software recognizes all options and object properties that might have been set in the relevant .inf. If an option or property isn't recognized, running the import job returns an error 172 (system file processed with newer version of software than version with which it was called). With the late 2022 introduction of importtool.exe (using newer technology) as an alternative for import.exe and the Designer import function, development on the latter import functionality has ceased. This has the consequence that when you use import.exe or the Designer import job editor/manager to run an import job for an .inf that has new options (say those that were introduced from Designer 7.6 and up), there's a chance you'll get an error 172 because import.exe has no support for the new property. In that case you'll need to start using importtool.exe to run your import jobs from now on. However, as long as you don't get the error, you can keep running your import jobs as you always did and you can even use the latest version of Designer for any changes to your application. Just keep in mind that you may activate a new option or property sooner or later, after which import.exe or an import with Designer will throw the mentioned error and you'll still have to move to importtool.exe.
Import jobs still have to be created in Designer (preferably use the latest version), so that doesn't change. Read more about importtool.exe here.
Contents
System flag to protect certain databases and datasets from being cleared to easily
Revamped online Help linked to Designer
Setting up custom XSLT import jobs
Create missing tables function renamed to Update SQL tables
Associating one or more printers with an output format
Preventing the retrieval of an invariant language value in ADAPL
New &1[5] reserved variable to distinguish import job test run
Using your own images on the Collections login page
Hard coded maps.inf now available for renaming in schemas.json
GIS implementation of WMTS map/overlay corrected and improved
2025-02-26: release notes Axiell Designer 7.15
The following bug fixes and new functionality for Designer 7.15 have been implemented:
|
Bug report no. |
Short problem description |
| AX-607 | When running Designer in admin mode, certain SQL tables relevant record access could be dropped when saving or reindexing an .inf, when duplicate entries existed in the record access table. |
| AX-599 | In the SQL database, record_access tables were dropped and not recreated, and unnecessary validating of all index tables for non-existing prirefs, when saving .infs. |
| AX-582 | Re-indexing broader(1l) in Designer caused collect_bt_nt_lrel table to drop all values. |
| AX-565 | XML records with multilingual fields with more than one occurrence were not imported when using importtool.exe. |
| AX-560 | Importtool gave an Object reference not set... error when importing some records into a metadata linked collect field. |
| AX-555 | IndexTool reported a Unique violation for unique keys and did not index them. |
| AX-553 | IndexTool crashed when a word in a Free Text indexed field is too long for the wordlist (>32 characters). With the fix, IndexTool now truncates the word to the maximum number of characters allowed, and logs the truncation action, mentioning the database, tag, priref, original value, truncated value. It is logged in the section reporting on the database where the truncated word was found. |
| AX-471 | The Save all button/menu was not activated after fixing application files with the Application Tester. |
System flag to protect certain database tables and datasets from being cleared too easily
In the new Standard model application (the successor to version 5.2) we have a sysoccdef.inf and systemlists dataset in thesau.inf which are a so-called system database table and dataset. When the Standard model application is deployed, these datasets will come filled with standard data and they should always be kept that way and never be emptied. To protect them from being cleared via Designer, a new Database type/Dataset type property is available for .infs and their datasets. By default this option is set to Standard but you can switch that to System for system database tables and datasets when you are running Designer as administrator.
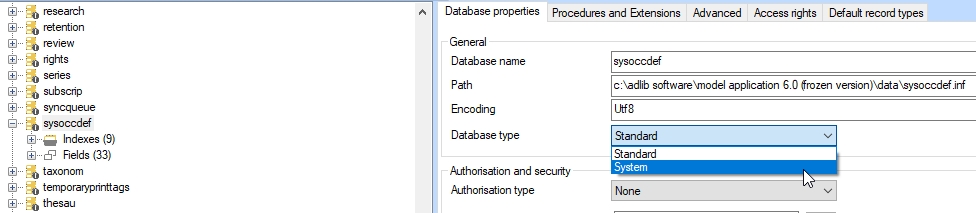
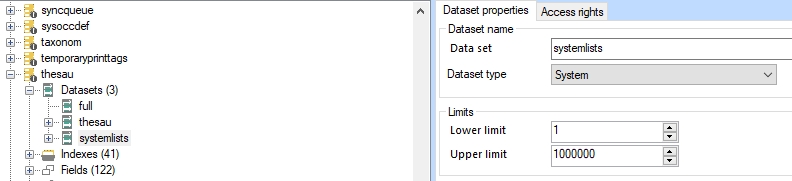
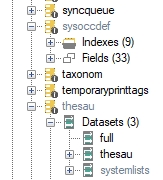
After saving and restarting Designer, the system .infs and datasets will be displayed in grey to indicate their new system status.
System database tables and datasets can’t be cleared by non-administator users any more: the relevant options in the right-click pop-up menus will be greyed out. Only when running Axiell Designer in elevated administrator mode will allow that and then only at individual database table level for the system database tables and datasets (so a Clear all databases in the \data folder will not clear system database tables). When clearing an individual system database table or dataset as administrator, a message similar to the following will show to ask if you really want to empty the relevant database table or dataset.
![]()
When clearing all database tables in the \data folder a note will be added in Axiell Designers main window, similar to the following:
Skipping system database sysoccdef; clearing not allowed
Skipping system database thesau; clearing not allowed
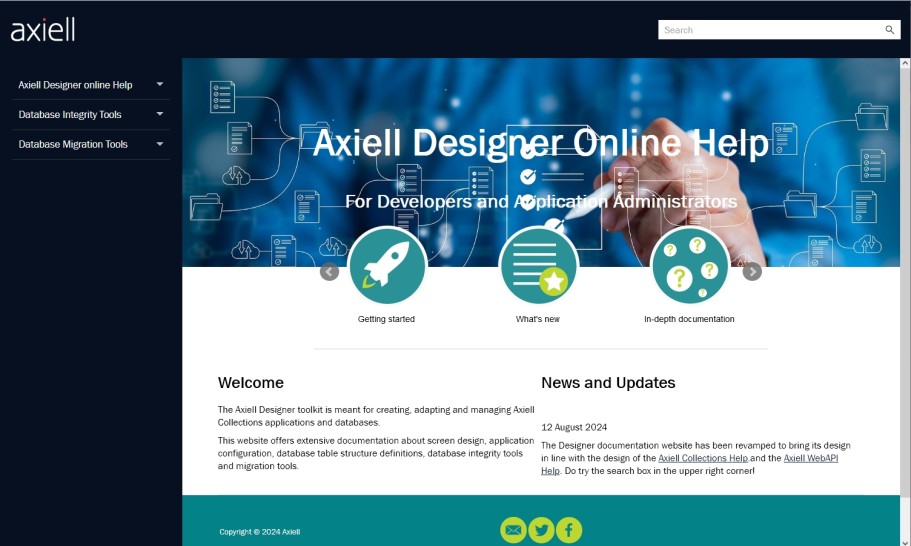
Revamped online Help now linked to Designer
Clicking a question mark button in one of the toolbars of this new version of Designer or pressing F1 when the cursor is located in an object property now opens the revamped Designer Help in a browser window. F1 tries to open a page relevant to the active property or properties tab, while a question mark button opens a more general page. You can always use the search box in the upper right corner to find what you are looking for.
Access to the internet is required for the online Help to open: there's no local version available with Designer.
Setting up custom XSLT import jobs
From Designer 7.15 it's possible to set up custom Collections import jobs using an XSLT to produce unstructured or grouped AdlibXML, ready to import via Axiell Collections. There are no standard XSLT stylesheets available at this point but you can imagine stylesheets for converting MARCXML or LIDO to AdlibXML.
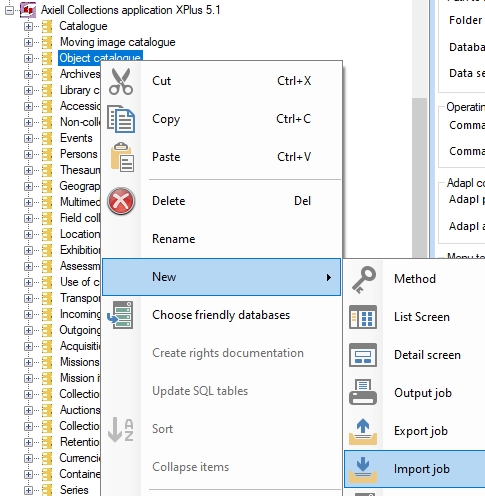
In the right-click pop-up menu for a data source in a pbk, simply select New > Import job.
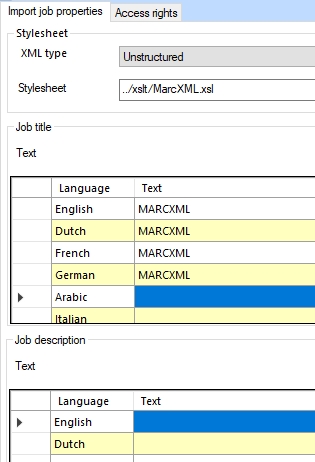
In the properties of the new import job select the XML type which is produced by the stylesheet, select the Stylesheet itself and enter a Job title in as many translation as your Collections application is available in. This job title will be visible in the Collections import dialog.
You may also specify Access rights to prevent certain users from using this import job.
Note that you can drag or copy and paste an import job definition from one data source to another, if you want.
Create missing tables function renamed to Update SQL tables
When you run Designer in administrator mode* - do that by right-clicking AxiellDesigner.exe in Windows Explorer and then select Run as administrator in the pop-up menu - the right-click pop-up menu for the \data folder or a selected .inf in the Application browser now has a Update SQL tables function (previously called Create missing tables). If tables are missing from the SQL database for whatever reason (if accidentally deleted, if new indexes were not reindexed or if a new table structure was not fully processed for example) or if existing tables need to be updated because something in the column structure has changed, then use this option and Designer will check the SQL tables against all the .inf's and their index definitions and will add (and reindex) any missing tables and/or update existing tables to meet the new specifications. Even if you think there's nothing wrong with your SQL database, it may help improve search performance in the database to run this option because over the years several improvements have been implemented in the SQL database structure, such as a SQL index on the modification date of records in the main data tables for faster retrieval of records when searching on that date.
The Update SQL tables function now also changes the column width for "user" from 32 bytes to 64 bytes, to allow for longer user names.
Associating one or more printers with an output format
From version 1.18, Axiell Collections allows users to print the result of an output format directly to a selectable printer (instead of the result opening as a document in Word or the browser first).

The Print button and the following Select printer dialog will only be present though if available printers have been set up in the Collections settings.xml file first. This option can only be implemented if you have a local installation of Collections. This setup is discussed here.
From Collections 2.0 it is also possible to associate one or more of those preset printers with particular output formats, so that users can never select an inappropriate printer for the chosen output format. This way, starting an output format for e.g. printing certain labels can automatically be directed to the proper label printer, while for A4 Word templates maybe only the default office printer can be used. This is especially useful if your organisation has multiple regular and/or label printers.
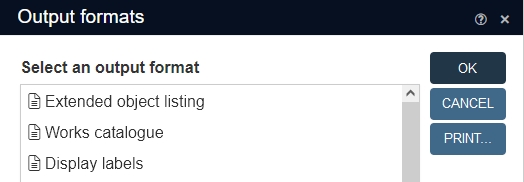
The implementation is such that after clicking the Print button, the user will first have to choose one of the allowed destination printers and click the OK button to start printing, even if only one printer is associated with the output format so that it is clear to which printer the output will be sent.
So besides the earlier mentioned settings to specify the available printers to begin with, settings similar to the following should go in the desired <SessionManager> node in settings.xml, so you can specify tenant-specific output format (job)/printer (device) mappings. Example:
<DesignatedJobs>
 <DesignatedJob id="Object catalogue/my Excel report">
    <Devices>
      <Device id="DefaultPrinter"/>
      <Device id="RICOH"/>
    </Devices>
 </DesignatedJob>
 <DesignatedJob id="Object catalogue/Inventory list">
  <Devices>
    <Device id="PDF"/>
  </Devices>
 </DesignatedJob>
</DesignatedJobs>
The above assumes that there are three devices configured already (DefaultPrinter, RICOH and PDF) in the <Devices> section of settings.xml. The id attribute value of the <DesignatedJob> node should reference the English name of the data source in which the output format appears (Object catalogue in this example) and behind the slash you should specify the English name of the desired output format (in this example, one is called my Excel report and the other is called Inventory list). So with this setup, the my Excel report job can only be printed to the Defaultprinter or RICOH device and the Inventory list output format can only be printed to the PDF device.
This job/device mapping should only list the exceptions; only output formats which target one or more specific printers should have a mapping. All other output formats, for which the user should be allowed to pick any printer, should not be mapped.
Preventing the retrieval of an invariant language value in ADAPL
When, in ADAPL, you want to assign a specific language value from a multilingual field to some other variable or tag, you typically use an assignment formatted like: te[1, 'en-US'] = te[1, 'en-GB'] or my_variable = te[1, 'en-GB']. If the desired occurrence is empty whilst the same occurrence does have a value in a different language that happens to be the invariant value, then that value is retrieved instead. However, you don't always want that to happen.
From Collections 2.0 and all other adapl-processing Axiell tools released at the same time, you can prevent an invariant value to be retrieved when the specified language value is empty by inserting an @ in front of the language code, so e.g. my_variable = te[1, '@en-GB' retrieves the English value only: if the indicated occurrence doesn't have an English value, an empty value will be assigned, regardless of whether an invariant language value is present. This functionaliy also allows you to check whether a value in the specified language is actually present, like so for example: if (te[1, '@en-GB'] = '') { ... }.
New &1[5] reserved variable to distinguish import job test run and errorm severity code support for Collections imports
The new &1[5] reserved variable for use in ADAPL (available from Collections 2.0) is 1 if the storage adapl is being run during a Collections import job Test run. Once the virtually imported records are actually saved (if the Save after successful test checkbox has been marked) and the storage adapl for the .inf is run for real - the test run execution didn't make any real changes to the record and didn't do any FACS write actions - the variable will become 0, which is also the default value when the import is being done without Test run.
You can use the variable to skip or replace FACS write actions in a neat way or to write error handling which is only executed during one of both stages in a Save after successful test import run. When using errorm statements in such a storage adapl, use an errorm severity indication of 0 or 1 to prevent the Collections import from failing because of displaying an error level message. Support for the severity code on errorm statements in storage adapls being run during an import in Collections, is available from Collections 2.0 too.
Using your own images on the Collections login page
Currently the background images for the Collections login page are automatically stored in the ..\Content\Backgrounds\Login sub folder of your Collections installation when Collections is installed or updated. From Collections 2.0 however, you can put your own images (.jpg or .png) in the Content\Backgrounds\Custom folder: you'll have to create that Custom sub folder manually first. On login, Collections will then first check if there are images in that Custom sub folder and will then only display those. If no images can be found there or when the Custom sub folder doesn’t exist, Collections will show what’s in the Login sub folder.
In output formats, Excel templates can now be combined with an adapl to pre-process data of each processed record before it is sent to the template.
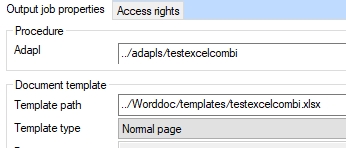
The combination works the same as a Word template+adapl combination. In the adapl you can address field contents directly via the field tag and change the value for output: the saved record contents doesn't change of course. In the adapl you can also use a dummy FACS database so that you can assign values to aliased tags from that database: in the template you must then refer to the field via the FACS name plus the field tag.
So for a template like the following:

You can change the values of the printed tag OB from the currently processed record and tag TI from the opened DUMMY FACS database record like so, for instance:
fdstart DUMMY '..\data+collect'
TI is dummyTitle
fdend
open DUMMY
if (&I = 1 or &I = &B[1]) {
dummyTitle = 'DUMMY: ' + TI
} else {
OB = OB + '-postfix'
}
close DUMMY
end
This test adapl just places the string "DUMMY: " in front of the title of the first and last record in the selection and for all other records it places the string "-postfix" behind the object name.
Whether you directly change a field tag's contents or use a dummy FACS database is a matter of preference: The FACS database allows you to point to the temporaryprinttags.inf database table definition (if present in your \data folder), for example, so that you can use proper temporary tags, but using tags from the currently processed record is faster to program.
Hard coded maps.inf now available for renaming in schemas.json
Collections 2.0 and up recognize the new MapsSchema in the schemas.json configuration file. The default section (with the hard coded field names and .inf name) is as follows:
{
"MapsSchema": {
"layerTypeField": "tp",
"projectionExtensionField": "px",
"gridMatrixField": "gm",
"gridResolutionField": "gr",
"mapSourceField": "ms",
"layerNameField": "nm",
"prirefField": "%0",
"parentMapField": "bt",
"layerColorField": "cl",
"layerFormatField": "ft",
"layerIdField": "id",
"parentMapLRefField": "l3",
"layerLabelField": "nm",
"layerOpacityField": "op",
"projectionIdField": "pi",
"layerSourceField": "sr",
"layerUrlField": "su",
"projectionExtentField": "pe",
"tileMatrixSetField": "tm",
"id": "MapsSchema",
"databasePath": "..\\data\\maps.inf"
}
}
The maps functionality in Collections uses maps.inf for base maps and layers. Its fields and .inf name are hard coded so if you'd like to change these names, you can now do this in the schemas.json configuration file.
You can add the above section to your version of schemas.json if you are already using one, but this optional. This doesn't require any work in Designer, but the topic involves application management so it is part of the Designer Help.
GIS implementation of WMTS map/overlay corrected and improved
The earlier described setup of WMTS maps or overlays hadn't been used before but actually didn't work. The functionality has been fixed and made easier to set up in Collections 1.19. It doesn't require any work in Designer, but the topic involves application management so it is part of the Designer Help. Please see the updated full topic to find how to set up a WMTS map or overlay: look (Ctrl+F) for the word "WMTS" in the relevant topic to quickly find all relevant information.