The ADAPL editor
An ADAPL editor is included in Axiell Designer.
| 1. | In the Application browser, open your Axiell folder and in it the sub folder with the ADAPL source files (.ada and .inc files). This folder could be named \adapl sources or \adapls.
Note that the Files tab (visible when you select the adapls folder) offers a grid view showing the internal name, modification date and file name of all adapl files. This grid view allows for filtering and better sorting of all files in the folder to quickly find the file you are looking for. Double-click a file to open its .ada file. |
| 2. | Click the adapl (the .ada file) in the list on the left to view and/or edit it in the upper right window pane. |
| 3. | You can adjust the code, if you wish, and recompile or save the adapl: right-click the window pane which holds the code and in the pop-up menu that appears choose either Compile, Compile with debug mode or Save. The results of compiling will be presented in the lower right window pane.
Note that the compiled file (.bin) will automatically be saved in the current folder. If you want to test your application with the adjusted adapl, then you may have to move the newly compiled file to the proper Axiell sub folders (which still hold the old version of that .bin file) first; an adapl may occur in more than one folder. (From model application version 4.2 though, the source files and compiled files will be located in one and the same folder.) |
Menu bar and preferences
At the top of the editor you'll see a menu bar offering all available editor functionality and shortcuts: see further down for an explanation of all these functions.
Settings > Preferences can be used to set your editor preferences if you don't like the default behaviour - editor settings will automatically be saved to Designer’s preferences.xml file in the %appdata%\Axiell\Axiell Designer\ folder.
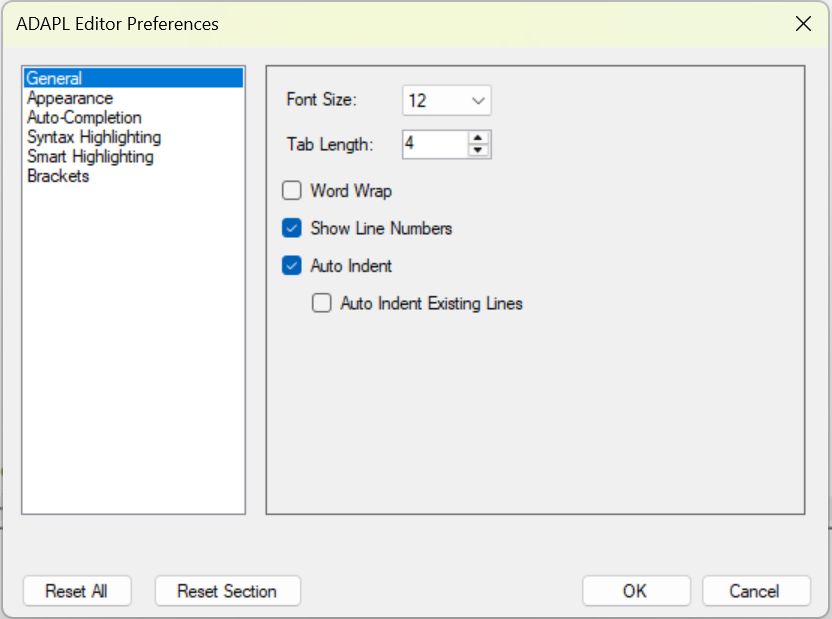
If you've changed any settings but would like to return to the default settings, then either use the Reset all button to reset al settings on all pages, or use Reset section to only reset the setting on the current preferences page. Always click OK to confirm changes.
Syntax colouring
To improve the readability of the code, colour coding is automatically applied:
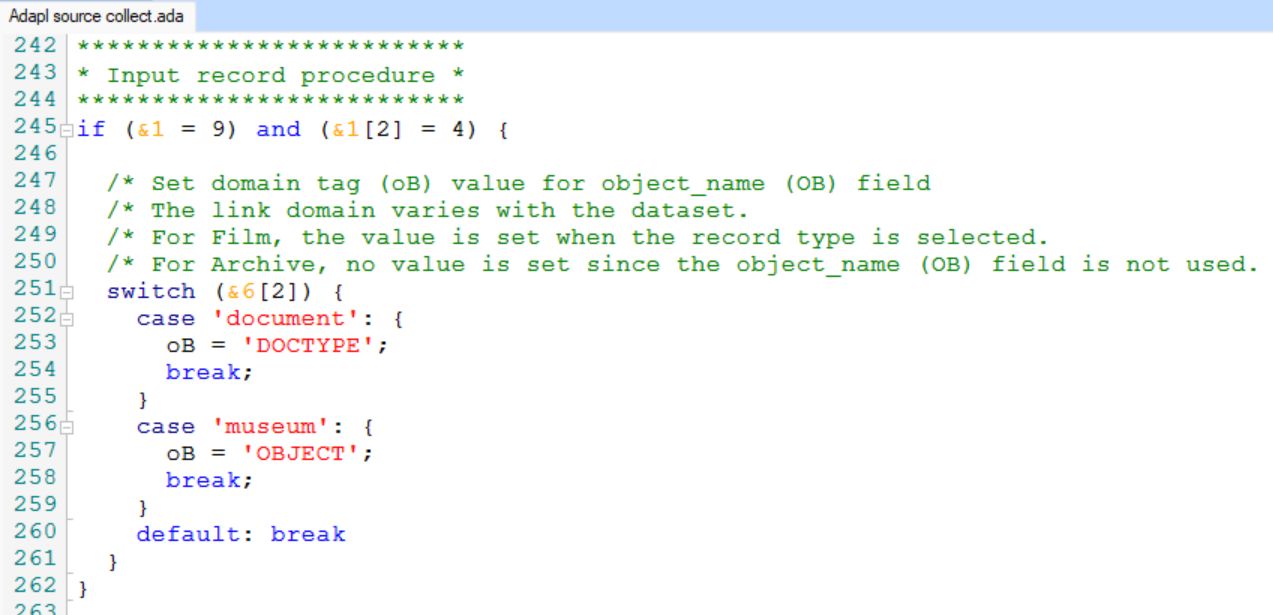
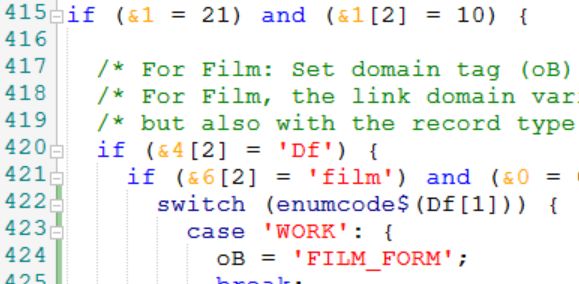
| • | Blue: reserved words in the ADAPL programming language; |
| • | Red: strings (fixed text values in between quotes); |
| • | Green: comments. |
If you don't like the default font colours, you can change them via Settings > Preferences > Syntax highlighting: click a coloured box to change the selected colour. The font type itself can be changed on the General tab.
Line numbers
Line numbers are present by default. This makes it easier to find a particular line if compiling the adapl reports an error in a certain line, and it also allows jumping to a certain line using the Shift+G key combination.
(Optionally, the display of line numbers can be switched off via Settings > Preferences > General > Show line numbers.)
Current line highlighting
The line which currently holds the cursor is highlighted with a light blue background to make it stick out more.

If you don't like the default colours of certain editing aids, you can change them via Settings > Preferences > Appearance: click a coloured box to change the selected colour.
Selecting words and lines
Double-click a word in your code to select it, or click and drag across multiple words to select them all. You can also triple-click to select an entire line. You can use this for copying or deleting words or lines. When you select a word, automatically all other instances of that word in the code will be highlighted too (this is called smart highlighting): you can use this to quickly see where a certain variable is used in all of the code, for example. This behaviour can still be tweaked via Settings > Preferences > Smart highlighting.
Finding matching brackets
For nested code it's sometimes hard to find the matching bracket to an opening or closing bracket. In the adapl editor you only need to click a (, ), { or } bracket (or right in front or after it, to get a blue highlight behind both the opening and matching closing bracket. Also, if the line that you clicked has a { or }, then a vertical green bar in the margin will indicate the beginning and ending of that code block, making it very easy to find matching curly brackets.
If you'd like other bracket types to show this behaviour, you can change the default types via via Settings > Preferences > Highlight brackets.
Auto-complete, tooltip functionality
Auto-complete functionality for ADAPL keywords, functions and '&' variables has been added. So as you're typing your code, the editor will present a list of all the keywords, functions and reserved variables matching what you've typed so far. You can scroll through the list using the mouse scroll wheel, by dragging the scroll bar in the list or by using your arrow keys and copy the highlighted item to your code by pressing Enter or by double-clicking any of the visible items. A tooltip explaining the selected item and showing its syntax is displayed as well.

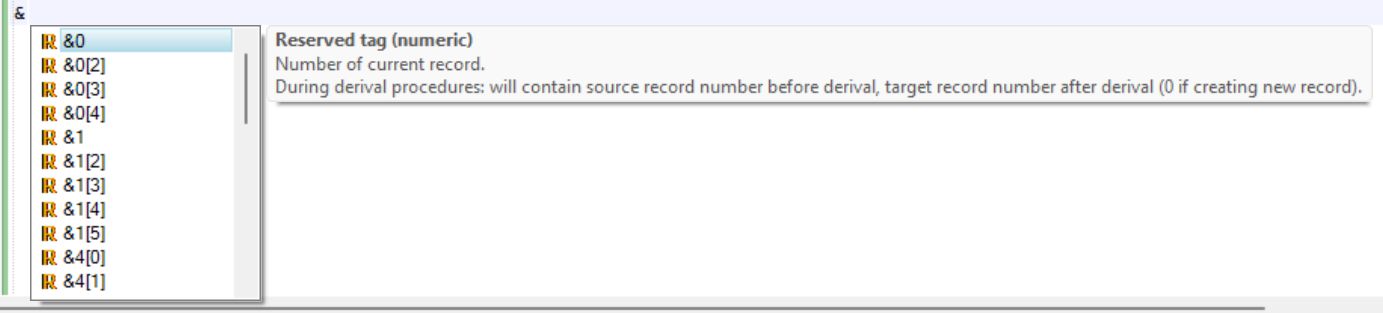

Tooltips also appear when you hover the mouse cursor over an ADAPL keyword, function or reserved variable in existing code.

The auto-complete behaviour can still be tweaked via Settings > Preferences > Auto-completion.
For ADAPL commands which take parameters, a parameters hints tooltip shows up as soon as you type the bracket behind the command. As you type the parameters/arguments for the relevant function the hints tooltip remains visible to provide help. It even keeps track of the position of the parameter you are currently entering and highlights the matching parameter in the hint in blue and provides a description of that parameter in the next line. For example, after typing ( behind enumval$, the source_text parameter in the hint is highlighted with its explanation underneath it, while after entering that parameter and having typed a comma, the tag parameter is highlighted.


If you stop entering parameters midway and return from elsewhere or if you'd like to see the hints tooltip again for existing code, then just put the cursor in the parameters for the function again and press Ctrl+Shift+Space.
If a function can be entered with different parameter lists, up and down arrows are visible in the hints tooltip. Click the arrows or press the up and down arrow keys on your keyboard to switch between the available hints.
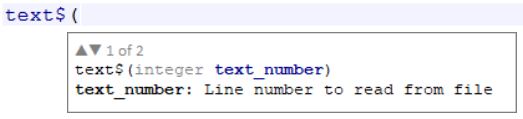

Functions with a variable number of arguments of a single parameter are supported by the hints window too:

Optionally you can switch off the automatic showing of the hints tooltip, via the Auto-completion > Automatically show parameter hints menu. After switching it off, the hint can still be displayed manually by pressing the Ctrl+Shift+Space shortcut.
Auto-indentation
For certain keywords, auto-indentation has been implemented so you don't have to do that manually. For example: the lines after a line containing fdstart will automatically be inserted one tab to the right and that indentation ends when fdend has been typed.
The auto-indentation behaviour can still be tweaked via Settings > Preferences > General. (With Auto-indent existing lines switched on, an existing line of code will fall in line with other indentation of surrounding lines the first time you type something in front of the existing line which breaks proper indentation.)
Code folding
Code between curly brackets, between fdstart-fdend code blocks and subroutine declarations can be collapsed (be hidden from view) by clicking the folding marker icon (a minus symbol) in the line number column at the beginning of the code block. The vertical dotted line starting underneath the first character on that line indicates which code block will be folded: if you don't like these vertical lines being displayed, you can switch them off via Settings > Preferences > Brackets > Show folding lines. The first line of code remains visible but will be greyed out. Similarly you can unfold the hidden code section at any time by clicking the + symbol. For compiling it is not relevant if code sections have been hidden or not. You can use code folding to hide sections in which you're not interested at the moment, so you can focus more easily on a piece of code you're working on.

Syntax error marking for unclosed strings
The editor has the ability to detect certain syntax errors. Currently only unclosed literal strings (which do not end with a quote) are detected and will be marked with a red squiggly line. Move the mouse cursor over the relevant line to get a tooltip explaining the error.

Compiling
To compile an adapl, right-click the code and select one of the Compile options from the pop-up menu. In the bottom window pane, the result of the compile attempt is clearly shown: "Compilation failed" in red font type or "Compilation successful" in green font type. It also indicates if compiling was done in debug mode. If compiling failed, just double-click the line stating the error to have the code automatically scroll to the relevant line and select it for you, so you don't have to look it up yourself. The line with the error will be highlighted in light red at first, but will turn to purple once the entire line is selected.
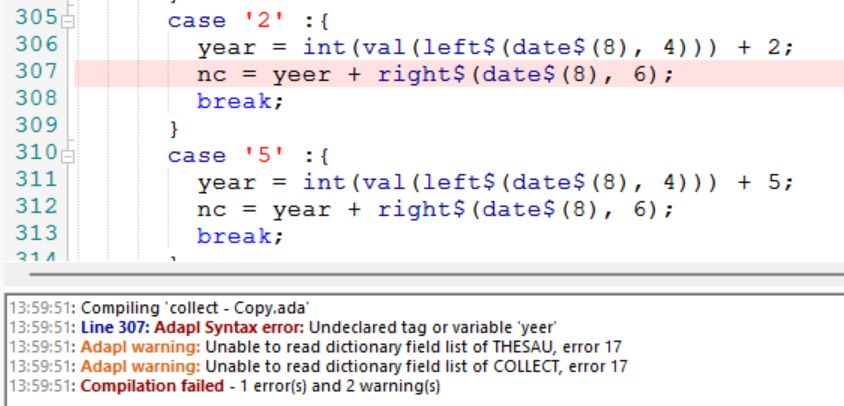
Note that warnings, although deserving your attention, can typically be ignored if compilation is successful.
Hot keys
A number of hot keys\key combinations have been implemented to ease editing:
| Hot key\Shortcuts | Short description | Long description |
| Tab | Increase indentation | This works from the cursor position or for a selection of lines to indent multiple lines at once. The indentation equals four spaces by default, but you can change that via Settings > Preferences > General > Tab length. |
| Shift+Tab | Decrease indentation | This works from the cursor position or for a selection of lines to decrease the indentation of multiple lines at once. The indentation equals four spaces (or less if character position 1 is reached). |
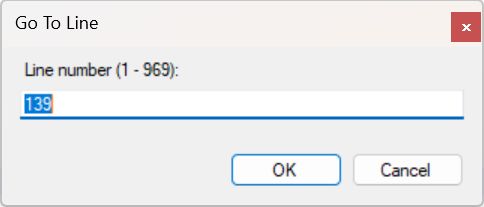
| Ctrl+G | Jump to a specific line |
Enter a line number for the cursor to jump to when clicking OK. By default the current line number is entered. The maximum line number range in the current adapl file is displayed between brackets.
 |
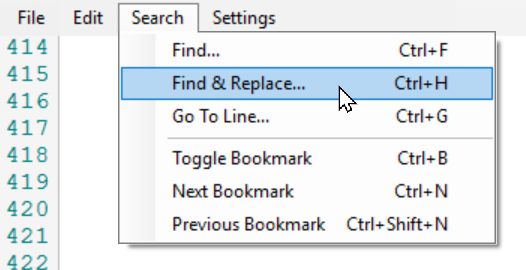
| Ctrl+F | Find a piece of code or text |
Enter any partial or complete string to search for in the code and in the comments and optionally mark Match case or Match whole word. You can also (instead) enter a regular expression, but then do mark the Regex checkbox. Click Find next to start the search. The dialog remains open so you can click Find next repeatedly to find each following occurrence of the string. You can edit the code while the dialog is open.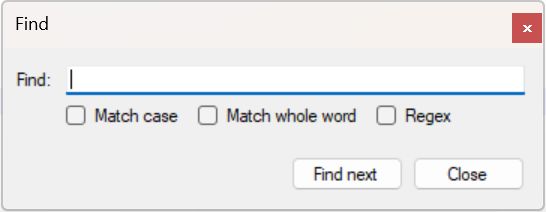 |
| Ctrl+H | Search and replace code or text | In the Find box, enter any partial or complete string to search for in the code and in the comments and optionally mark Match case or Match whole word. You can also (instead) enter a regular expression, but then do mark the Regex checkbox. Optionally, enter a replacement string in the Replace box. Click Find next to start the search. The dialog remains open so you can click Find next repeatedly to find each following occurrence of the string. As soon as you find the string occurrence to replace, click the Replace button. If you are sure that you'd like to replace all occurrences of the string in Find, you can click the Replace all button. If you leave the Replace box empty, you'll replace a found string by nothing (so the string will be removed). You can edit the code while the dialog is open.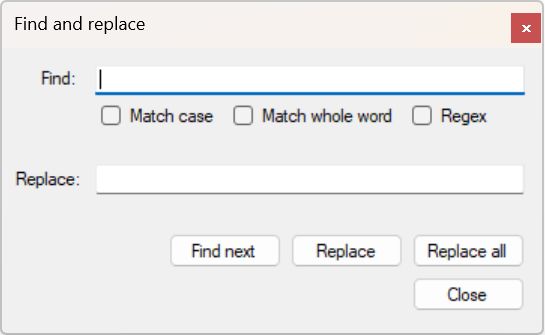 |
| Ctrl+arrow left, Ctrl+arrow right | Go to word on the left or right | If you are using the arrow keys to move the cursor through a line, you can do this quicker by also pressing the Ctrl key. |
| Ctrl+U, Shift+Ctrl+U | Converts selected text to upper or lower case | |
| Ctrl+B | Adds or removes a bookmark in the current line | A bookmark can be used to remember a line or piece of code to look at. A bookmark is indicated by a purple dot behind the line number. |
| Ctrl+N, Ctrl+Shift+N | Navigates to next or previous bookmark | |
| Ctrl+Z, Ctrl+Y | Undo or redo your changes |
This functionality keeps a long history, so a lot of changes can be undone or redone. |
| Ctrl+Shift+C | Comments out or uncomments selected lines | Using this shortcut, selected lines will be commented out with /* if they are currently not commented out, while selected lines will be uncommented if they are currently commented out. If you select normal lines and commented out lines together and use this shortcut, the first selected line will be leading in what happens to all of the selected lines. |
Detection of external modifications
Whenever the file that you are currently editing has also been edited and saved in a different program at the same, the ADAPL editor will notice this automatically and will ask you if you'd like to reload the file with the saved changes from the other program (and lose changes here that you didn't save yet) or not. In case you choose No, you'll keep working in your currently loaded version and when you save it, this version will overwrite the file saved by the other program.
Note that the File menu and the right-click pop-up menu also offer you the possibility to reload the .ada file from disk manually. You can use this function if you want to undo a lot of changes since your last save and start fresh with the most current save.