Setting up a IIIF image server

Contents
The processing of images retrieved by the Collections Media Viewer can be handled in two ways:
- by the browser: this requires no extra setup and is expressed in the Collections settings.xml file by the following default section with mostly comments:
<ImageServerConfiguration>
<Viewer>Browser</Viewer>
<!-- IIIF viewer options: -->
<!-- <ImageServerUrl>http://{localhost}/imageserver/
iipsrv.fcgi</ImageServerUrl> the URL to the
IIIF image server -->
<!-- <FolderMappingList> optional, useful for
enterprise environments -->
<!-- <FolderMapping> repeat for each branch -->
<!-- <LowerLimit>1</LowerLimit> priref of lower
limit of branch dataset -->
<!-- <UpperLimit>10000000</UpperLimit> priref
of upper limit of branch dataset -->
<!-- <Folder>museum-01</Folder> name of the
branch sub-folder containing the branch
specific Adlib/Axiell application -->
<!-- </FolderMapping>-->
<!-- <FolderMappingList> -->
</ImageServerConfiguration>
- by IIIF (pronounce: triple I F) image processing: the International Image Interoperability Framework defines several APIs that, amongst others, provide a standardised method of describing and delivering images over the web. Depending on whether the processed images have been made IIIF compliant or not, using this functionality offers several advantages over browser processing of images, but both offer the possibility of deep zooming: although your images contain a fixed amount of information, algorithms can sharpen a picture and enhance its contrast just before display, also allowing you to zoom in further without losing too much detail. The IIIF media viewer in Collections offers a slightly different interface than the normal media viewer, offering a more fluent zooming experience.
A substantial performance improvement during the loading of high resolution images can be achieved if IIIF compliant images, so-called pyramidal tiled .tiff files, are used because it retrieves much less information than contained in the original image file. This is possible because when an image is converted to a pyramidal tiled .tiff file (which requires a special, internal Axiell tool) it is not only converted to several smaller resolution versions of the entire image (which will be retrieved when users view the entire image) but each of those resolution layers (forming a pyramid) is divided up in tiles as well so that zooming in to a particular part of an image only requires retrieving that particular tile. This also means that with IIIF compliant images you don’t need to worry about the file size of high resolution images slowing down performance of Collections, since the IIIF API only retrieves the part of the image it needs and in the resolution that is currently required.
IIIF image processing and the optional bulk conversion of your existing images to IIIF compliant pyramidal tiled tiffs may involve additional licensing fees and conversion costs. Please consult our Sales department for information about options and pricing. Note that currently no automatic conversion to IIIF compliant pyramidal tiled tiffs is available in Collections, so normal images that are linked to records won’t be converted.
Setting up the IIIF functionality
| 1. | Place the IIIF image server files on the web server which stores the (converted or normal) images themselves.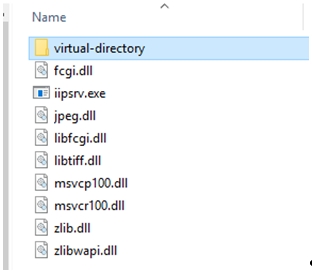 |
| 2. | In the Collections settings.xml file replace the default Browser viewer by IIIF and uncomment (or add) an <ImageServerUrl> node in which {localhost} must be replaced by the actual server name containing the Axiell IIIF image server files, for example: <ImageServerConfiguration> <Viewer>IIIF</Viewer> <ImageServerUrl>http://ourserver/imageserver/iipsrv.fcgi</ImageServerUrl> </ImageServerConfiguration> |
| 3. | Open IIS. Select the Default Web Site and click Basic Settings… under Actions. Check the Application pool.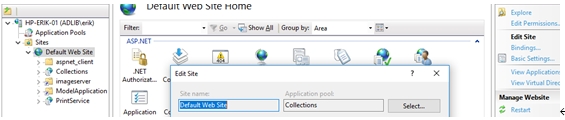 Close the Edit Site window, select Application Pools under Connections, select the application pool used for the default website and click Advanced Settings… under Actions. Look up the (Process model) Identity. The identity specified here should have access to the server containing the \images folder. The image server will use this identity, so specify an appropriate user and application pool for the default website. |
| 4. | With the Default Web Site selected, double-click the Authentication icon. Then select Anonymous Authentication and click Edit under Actions. By default the Anonymous user identity is set to a Specific user (IUSR): make sure to set the Anonymous user identity to Application pool identity. Click OK.  Underneath the default website, add a virtual directory called imageserver (that we already set in the <ImageServerconfiguration>) for the IIIF image server \virtual-directory subfolder. 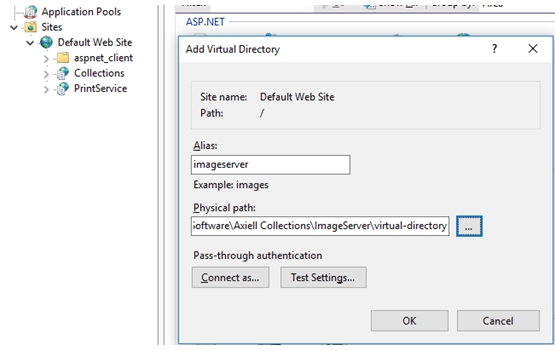 |
| 5. | In IIS, add another virtual directory for your main images folder, with for example Alias: ModelApplication and as Physical path the actual path to the \images subfolder of your Axiell system. |
| 6. | In IIS, select the main Connections node on the left and double-click the FastCGI Settings icon in the middle window pane.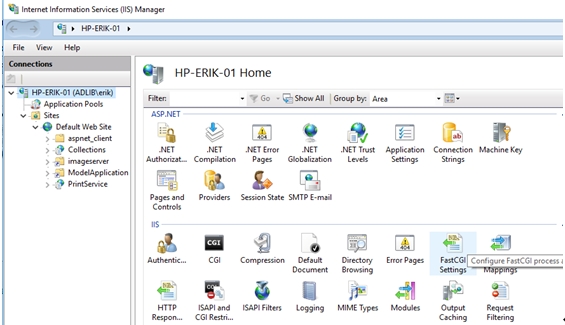 (If the icon isn’t present, you’ll have to turn the CGI Windows feature on first via the Control Panel (select Programs > Turn Windows features on or off – Internet Information Services > World Wide Web Services > Application Development Features – and mark the CGI checkbox, but this may vary per Windows version.) |
| 7. | Then click Add application in the right IIS window pane, under Actions. For the Full Path option in the Add FastCGI Application window, look up the path to iipsrv.exe, one of the IIIF image server files that you placed on your web server in step 1, via the … button. |
| 8. | Put the cursor in the field behind Environment Variables and click the … button. Add the following members: 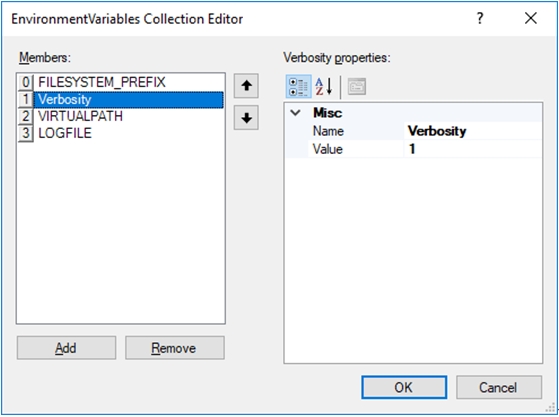 with the following values: - FILESYSTEM_PREFIX: the path to your images subfolder, C:\Collections\Model application 4.5\images/ for example; - Verbosity: a number between 0 and 10 which determines how much the server should log; - VIRTUALPATH: the URL to the virtual directory for your images folder, something like http://ourwebserver/ModelApplication/ - LOGFILE (optional): a path to a log file, C:\Ourweb\ImageServer\virtual-directory\Logs\log.txt for example. Click OK twice to close both windows. |
| 9. | Go back to the Default Web Site in IIS and double-click the Handler Mappings icon.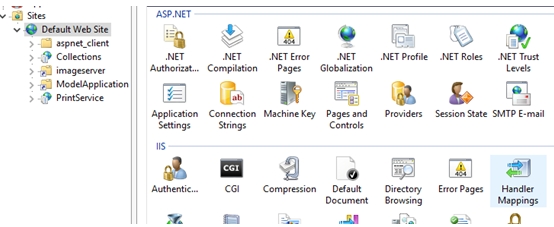 Then click Add Module Mapping, under Actions. |
| 10. | Fill in the Add Module Mapping dialog as follows, but select your own path to the iipsrv.exe file in your IIIF image server folder. Click OK to close the window: you’ll have to confirm your action.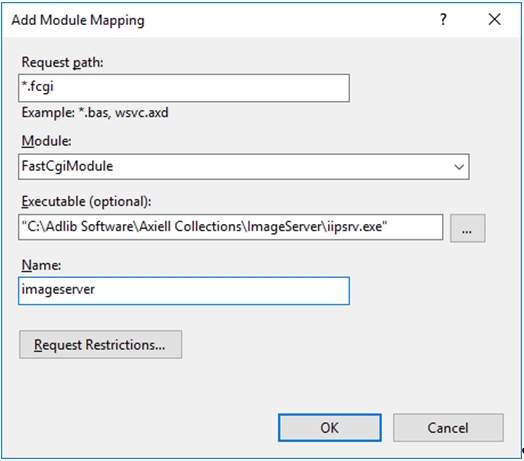 |
| 11. | Now select your new imageserver module mapping in the list of Handler Mappings (probably all the way at the bottom) and click Edit Feature Permissions under Actions. Mark the Execute checkbox so that all checkboxes are marked and click OK.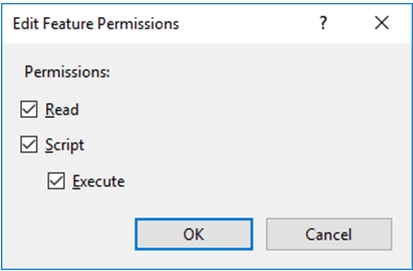 |
| 12. | This should conclude the installation of the IIIF server and you may close IIS. To test if the server is working correctly, open a browser and enter a URL similar to the following (replace localhost by the name of your web server and 103.jpg by the file name of an existing image in your \images sub folder): http://localhost/imageserver/iipsrv.fcgi?IIIF=103.jpg/info.json If the browser displays a valid json response, then the IIIF server has been installed correctly. For example: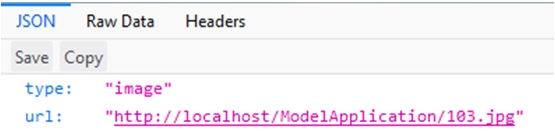 If you get a single message stating that <file path> is not a regular file and no glob support enabled, you should check the application pool identity and its access rights to the server containing the \images folder again. If the JSON data displays alright, but clicking the link gives an HTTP Error 401.3 – Unauthorized, it might be that IIS users have no access to the server on which your \images folder is located. In this case, Axiell Collections won’t show any images in the Media Viewer. |
Media Viewer support for third-party IIIF image servers added to allow for extra image processing functionality
Since some image file formats cannot natively be displayed in browsers, like TIFF images for example, and Axiell's proprietary IIIF image server has its limitations, support for third-party IIIF images servers with possibly more functionality is available from Collections 1.17 and up. One such (open-source) third-party image server, Cantaloupe, for example, is capable of on-demand creation and conversion of derivatives of different image formats to IIIF-compliant image formats that can be displayed in the Axiell Collections Media Viewer.
In the Collections settings.xml, the following extra settings are required:
- whitelist the third-party IIIF image server address in the <Security><Csp> section as <WhitelistImages>http://localhost:8184</WhitelistImages>
- make the proper settings in the <ImageServerConfiguration> section, like:
<Viewer>IIIF</Viewer>
<ImageServerUrl>http://localhost:8184/iiif/2/</ImageServerUrl>